
Replacing deprecated vShield by NSX for vSphere
VMware vShield is part of the vCloud Networking and Security (vCNS) suite. Its latest version 5.5 has reached EOGS (end of general support) in September 2016 and has been replaced by NSX for vSphere.
We still see quite a lot of vShield installations in productive environments. Mainly used for agentless guest introspection together with security solutions like Trendmicro DeepSecurity, McAfee Move or others. Now that many customers consider migrating from vSphere 6.0 to vSphere 6.5, they have to face the fact that vShield is no longer supported from vSphere 6.5 onwards. And it is crucial to take product compatibility into account. There is a relationship between different vSphere, NSX and security product versions.
That’s why I show different migration paths in this blog article.
Before the upgrade
Read the product compatibility matrix, or you’ll end up in trouble.
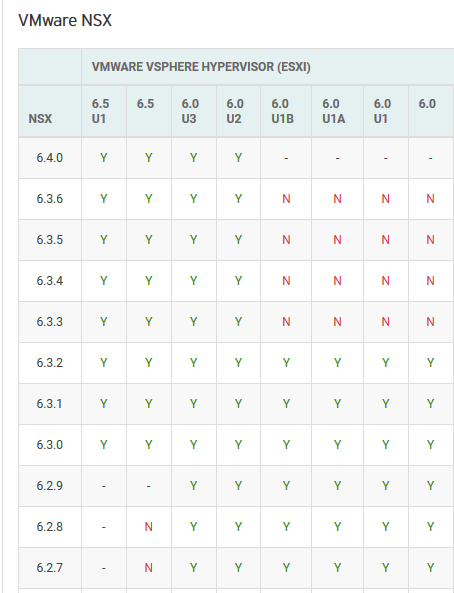
In our example we had an environment with ESXi 6.0 U2, protected by vShield 5.5.4 and Trendmicro DeepSecurity 9.6. I’d like to point out that TrendMicro offers a very comprehensive product matrix which helped a lot. You can see that vSphere 6.0 U3 is the end of the road for vCNS (vShield). Before upgrading to a higher vSphere version, we first have to switch to NSX.

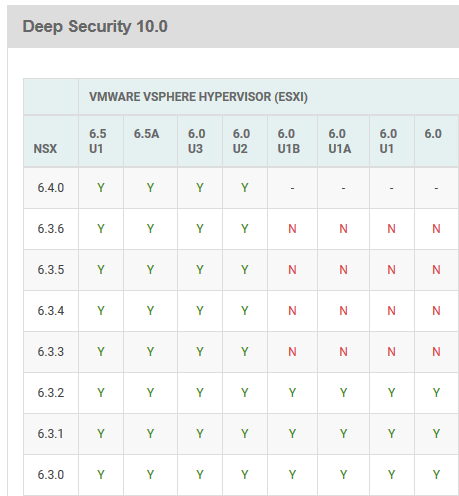
Which NSX version can we use? In the matrix below we can see NSX 6.3.3 is compatible with all ESXi versions from 6.0 to 6.5 U1. It is compatible with DeepSecurity 9.6 and 10.0.
Way back
I would really recommend to make snapshots on vCenter, vShield-Manager and DeepSecurity Manager. Just in case you’re facing any problems (yes, we did) during migration and you need to rollback.
Migration path
Here’s an outline of the workflow in general: Change platform from vShield to NSX, upgrade vSphere, upgrade security product (optional).
Basically you have two options for your migration to NSX:
- inplace migrate: install upgrade package on vShield to migrate it to NSX
- make fresh: de-register and uninstall vShield components. Deploy fresh NSX manager.
Inplace migration
Inplace upgrading an existing vShield Manager to NSX-Manager is nice, because all you have to do is to deploy an upgrade package to vShield-Manager and click install. In the end you will have a fully functional NSX-Manager with vCenter plugin and same network settings you’ve had before in vShield-Manager. The downside of that process is that your choices of NSX versions are limited. Latest available NSX upgrade package is vShield to NSX 6.2.9. But version 6.2 is close to its end of general support (EOGS) and not compatible with ESXi 6.5. That means you’ll have to update NSX again before upgrading vSphere.
New NSX deployment
With a new deployment you first have to uninstall vShield modules from ESXi servers and disconnect all vShield components from your vCenter and your security solution (in our case DeepSecurity Manager). We prefered this method over an inplace migration, because we can choose the exact NSX build that fits both vSphere versions (6.0 and 6.5) and we will have a fresh NSX-Manager appliance.
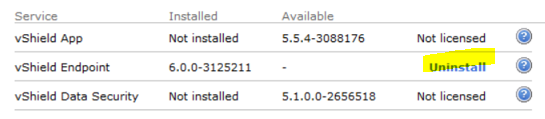
Uninstall vShield Endpoint Service from ESX Servers
Make sure ESX-Servers are NOT in maintenance mode. Uninstalling vShield Endpoint service should not require a host reboot.
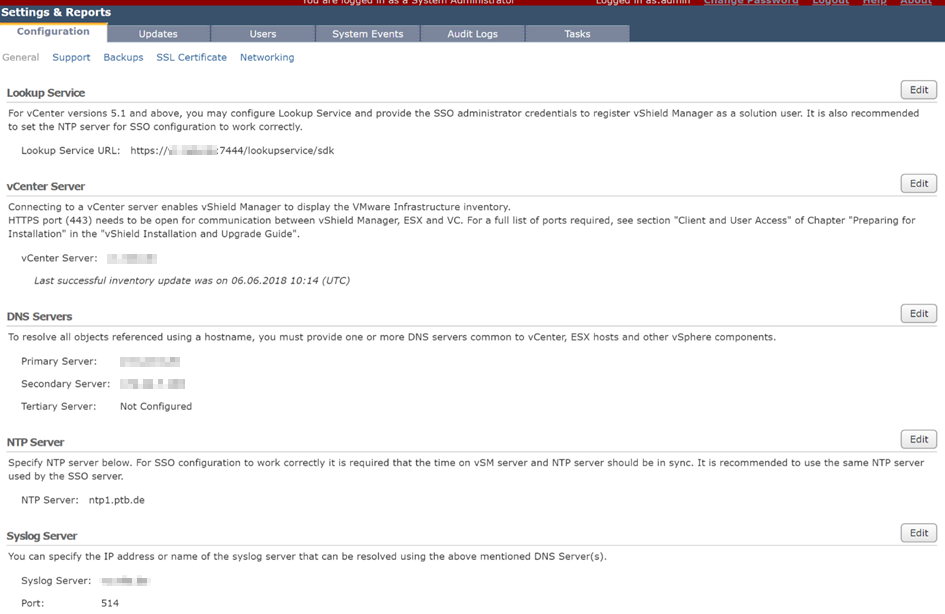
Disconnect vShield Manager from vCenter
In vShield Manager go to Settings and Reports > Configuration. Clear entry’s for Lookup-Service and vCenter. If one of them is mandatory, leave the original setting. It doesn’t matter.
Disconnect vCenter from DeepSecurity Manager (DSM)
This step is optional, but we want to have it clean.
Remove vShield plugin from vCenter
You might be required to remove it manually.
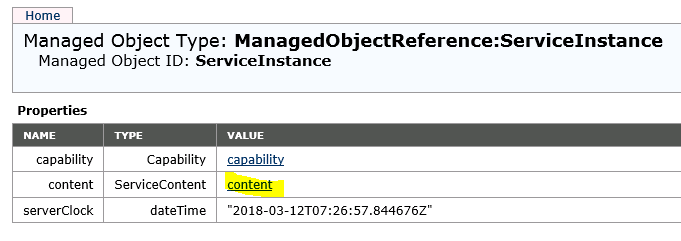
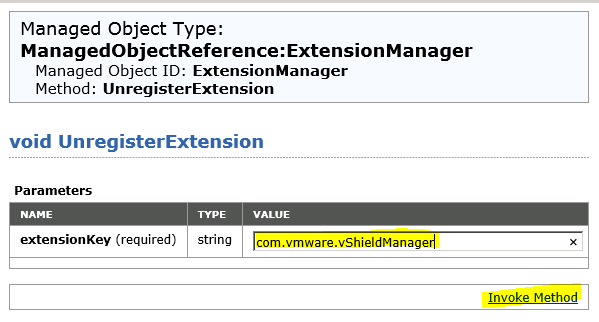
https://<vCenter FQDN>/mob
Login with vCenter administrator credentials.
Go to content -> extensionManager. If the list is too long, click on “more”.

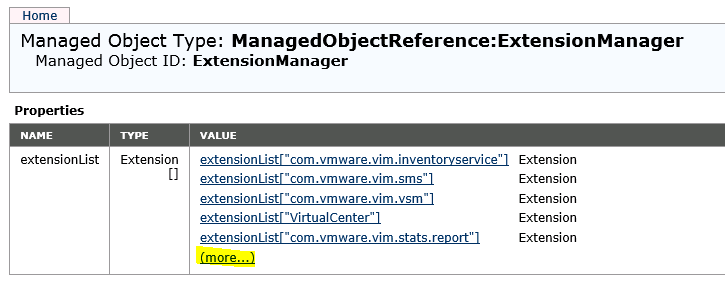
In the extension list look for extension “com.vmware.vShieldManager”. Click on link.
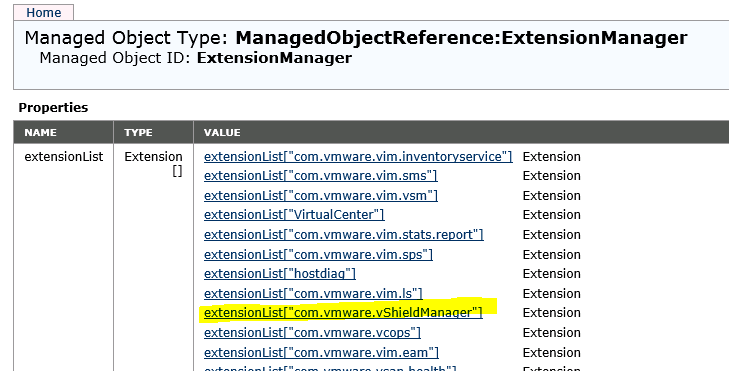
Copy string “com.vmware.vShieldManager” (without quotes).

Go back one level (browser function). In section “Methods” click link “UnregisterExtension”.
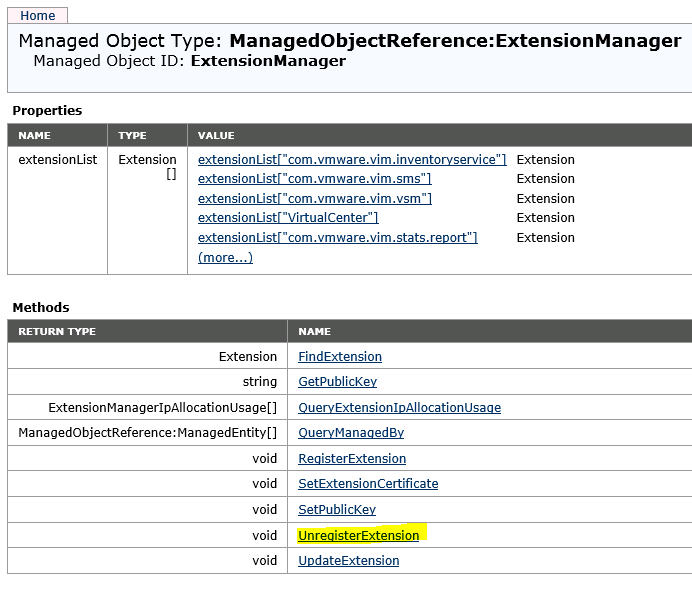
Paste extension key into value box and click invoke method.
Shutdown old appliances
You may now shutdown vShield Manager and all helper appliances (e.g. DeepSecurity virtual appliance – DSVA).
Deploy NSX Appliance
Deploy your NSX-Manager OVA image to vCenter and follow the OVA-deployment wizard.
One Comment on networking: NSX usually requires distributed vSwitches, but if you’re going to use only guest introspection in your environment, you may use virtual standard switches.
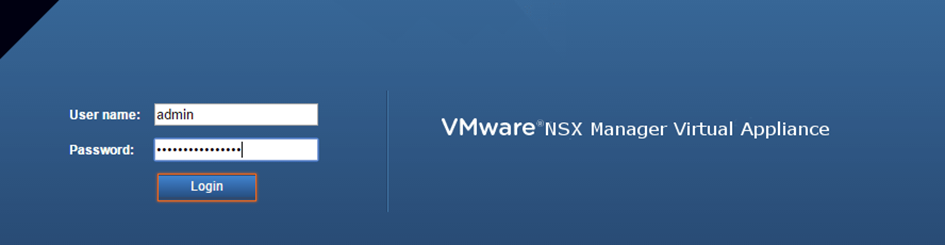
Power on NSX-Manager and navigate to its address
https://<NSX-Man IP>
Login with admin and the password you’ve defined during deployment.
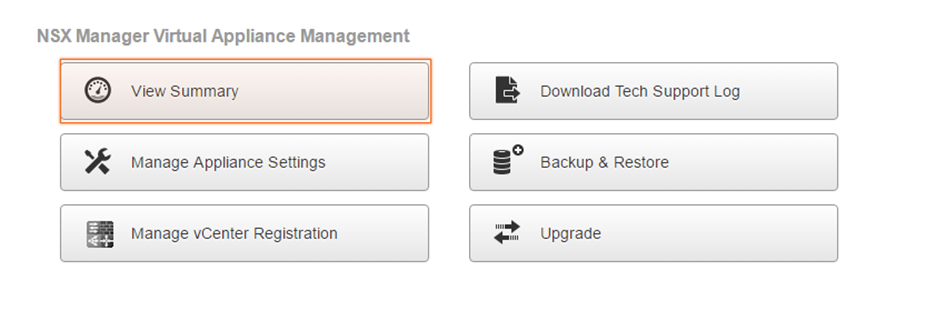
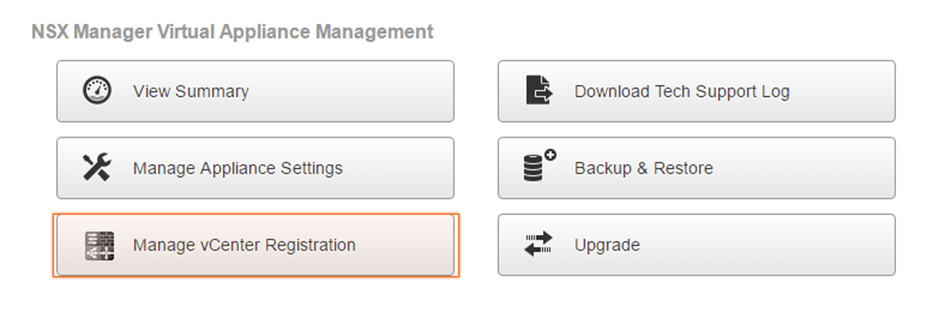
Go to “View Summary”
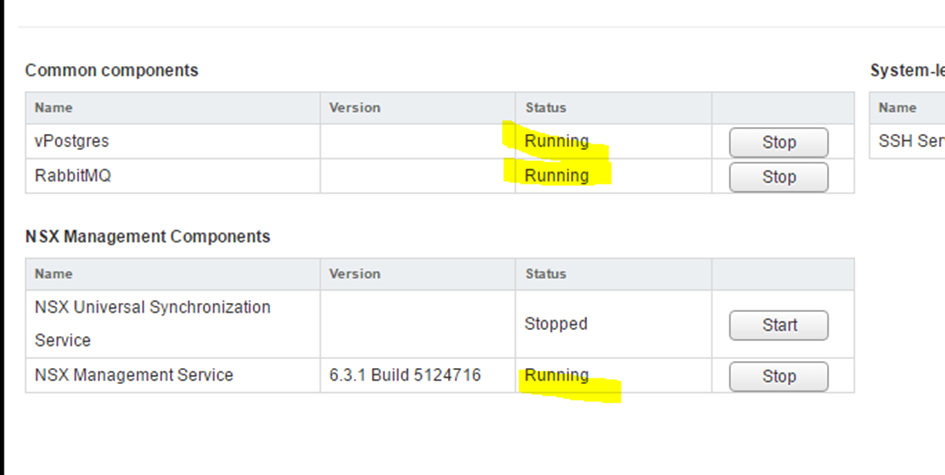
Check if services vPostgres, RabbitMQ and NSX-Management-Service are running.
Click on home-icon (upper left corner) and select “Manage Appliance Settings”
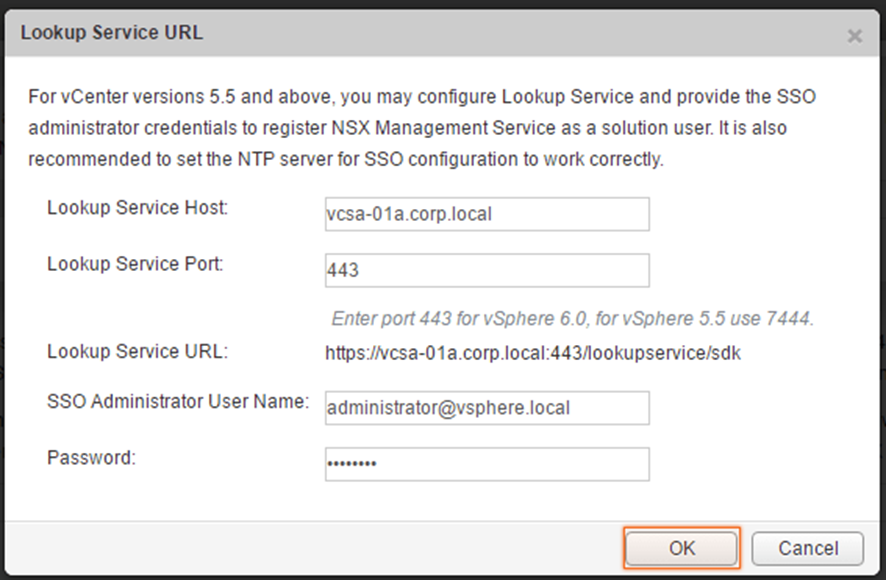
Enter NTP- and Syslog server. Click on home-icon and select “Manage vCenter Registration”.
Enter addresses for vCenter server and lookup service.
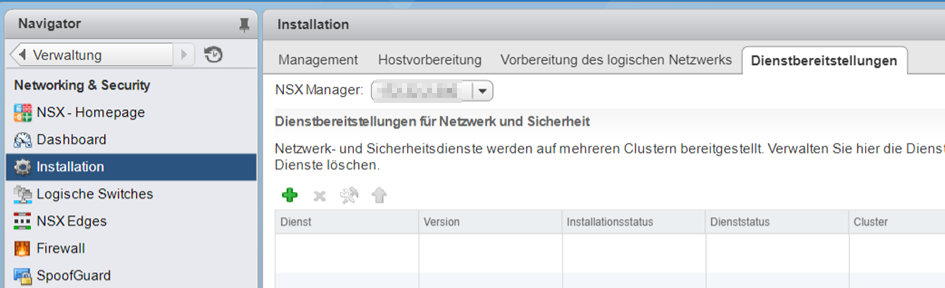
After you’ve deployed and configured NSX-Manager, you’ll find a new section “Networking & Security” in vCenter administration.
Prepare Hosts for guest introspection
If you’re using virtual standard switches there is an extra step to do. If you’re using dvSwitches you can skip the next section.
Edit Agent-VM settings on Hosts
In webclient navigate to “hosts and clusters”. Select first ESX host. On the right window select tab “Manage” > Settings. Click “Agent VM Settings” and configure to use the local datastore and standard port group. Repeat on every ESX host, that need to be prepared for guest introspection.
Install Guest Introspection Service
Open webclient. Go to home > “Networking and Security”. Select “Installation” on the left side. Select tab “Service deployment” on the right side.
Click on the green plus symbol and choose service “Guest introspection”.
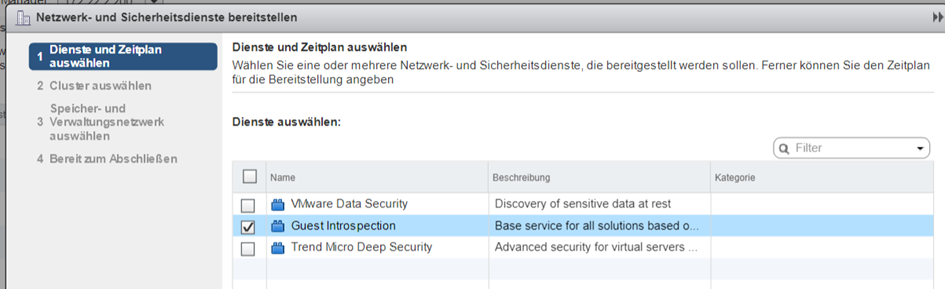
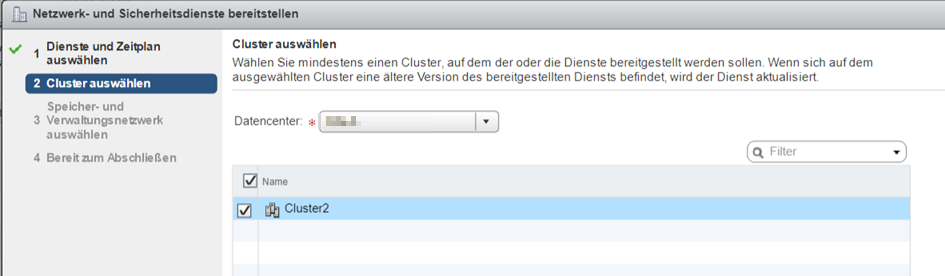
Select datacenter and cluster.
Select datastore and distributed portgroup. If you’re using standard portgroups and have therefore defined Agent-VM settings on host, select “defined on host” for both datastore and network settings.

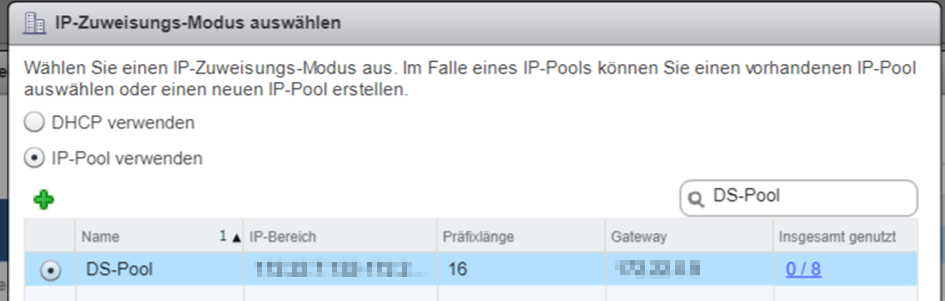
IP-assignment can be done dynamically by DHCP, or with an IP-pool. You can define an IP-pool directly in the wizard.
Once you finish the wizard, NSX-manager will start to deploy introspection appliances on each host in the cluster.
At this point we ran into severe trouble, which we could track down together with VMware support. The root cause of the problem wasn’t directly related to NSX, but to a broken ini file on vCenter, which prevented agent manager service to start (eam-service). After fixing the corresponding ini file, guest introspection service and appliance deployment finished smoothly.
Almost finished
Congratulations! You have successfully replaced vShield with NSX. Depending on your security product, you’ll have to make further adjustments in your security manager. I will cover this procedure for DeepSecurity in a second post. For now the vSphere 6.0 cluster is working with NSX and can be upgraded to vSphere 6.5.
After checking functionality, do not forget to delete the snapshots you’ve made at the beginning.