

While playing with the latest ESXi / vSAN beta, I ran into a problem. I was about to deploy a vCenter Server Appliance (VCSA) onto a single ESXi host, that was designated to become a vSAN Cluster. During initial configuration of vCenter something stalled. Needless to say that it’s been a DNS problem. 😉
That part of vCenter/vSAN deployment is delicate. If something goes wrong here, you have to start over again and deploy a new vCenter appliance. When you run the installer a second time (after you have fixed your DNS issues) you won’t see any disk devices to be claimed by vSAN. Where have they gone? Well, actually they are still there, but during the first deployment effort they were claimed by vSAN and now form a vSAN datastore. But a greenfield vSAN deployment on a first host needs disks that do not contain any vSAN or VMFS datastore.
How to release disks?
Usually you can remove Disk Groups in vCenter. But we don’t have a vCenter at this point. Looks like a chicken-and-egg problem. But we do have a host and a shell and esxcli. Start SSH service on the host and connect to the shell (e.g. Putty).
Let’s get some information about our devices.
esxcli vsan storage list
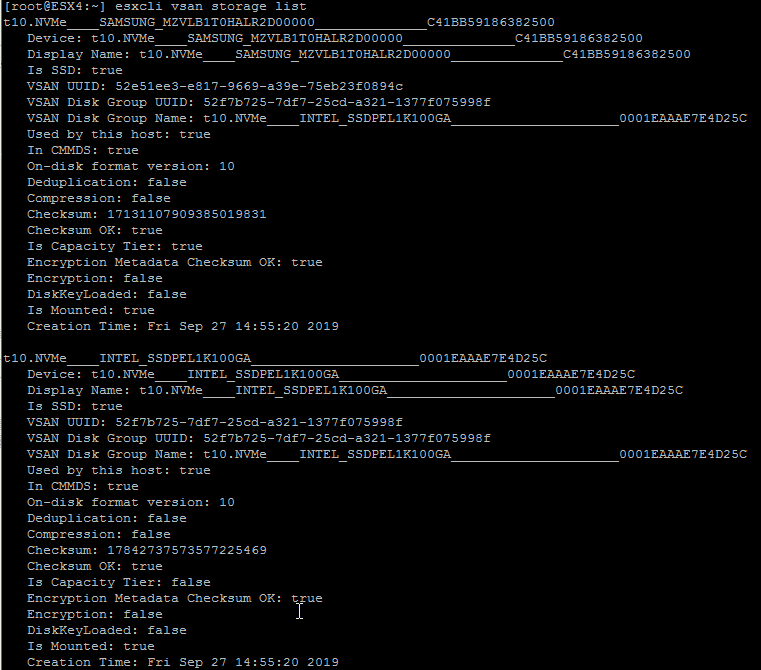
Here we go. Both devices are present but part of a vSAN datastore. We need to destroy that datastore before we can launch the greenfield wizard again. But first we need to make sure that automatic claiming is disabled on your host.
esxcli vsan storage automode get
If the result is “true” we need to issue the next command. Else we can skip this step.
esxcli vsan storage automode set --enabled false
To remove the vSAN datastore it is sufficient to remove the caching device. That will kill the disk group. The remove command has two parameters [-s] and [-d]. Where -s is for SSD devices and -d for magnetic disks.
esxcli vsan storage remove -s [device name]
In my case I had to remove the Intel cache disk. It is a good idea to copy the long name from the shell unless you like counting underscores. 😉 Just highlight it with your mouse, type the command and paste the name with your right mouse button.
esxcli vsan storage remove -s t10.NVMe____INTEL_SSDPEL1K100GA_____________________0001EAAAE7E4D25C
After unclaiming the two disks I was able to run the VCSA installer again and it correctly claimed the two devices to build a new vSAN datastore.
