As part of my work as a trainer, I often come across questions on topics that are only covered in passing or not at all in the course. This series of articles provides trainee IT experts with tools for everyday use.
Intro – What are Diskgroups?
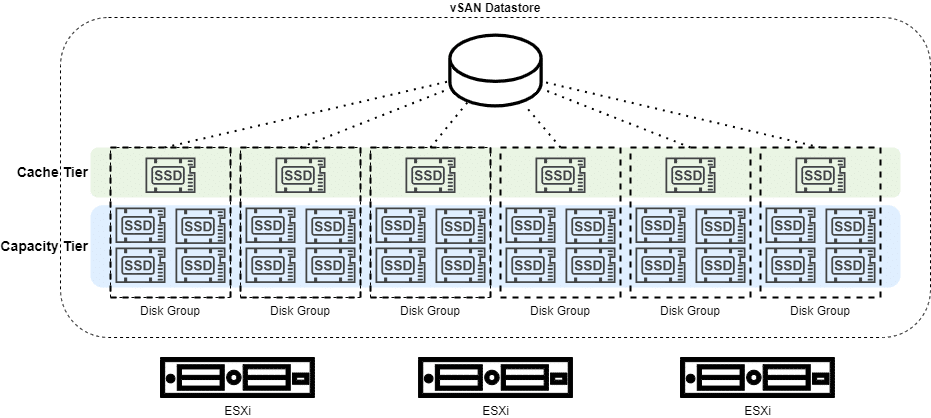
VMware vSAN OSA (original storage architecture) structures the vSAN datastore into disk groups (DG). Each vSAN node can contain up to 5 disk groups. Each of these disk groups consists of exactly one cache device (SSD) and at least one to a maximum of 7 capacity devices per group. These may be either magnetic disks or SSDs, but no combination of the two. We differentiate between cache tier and capacity tier.
Disk groups can be managed using the graphical user interface (GUI). However, there are situations where disk group management on the command line interface (CLI) is necessary or more appropriate.
UUID
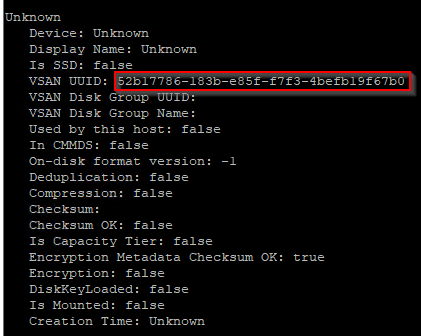
Each disk device of a vSAN cluster (OSA) has a universally unique identifier (UUID).
We can list all devices of a vSAN node on the CLI with this command:
esxcli vsan storage list
The sheer amount of information may be a bit too much and we only want to display the lines containing the UUID.
esxcli vsan storage list | grep UUID
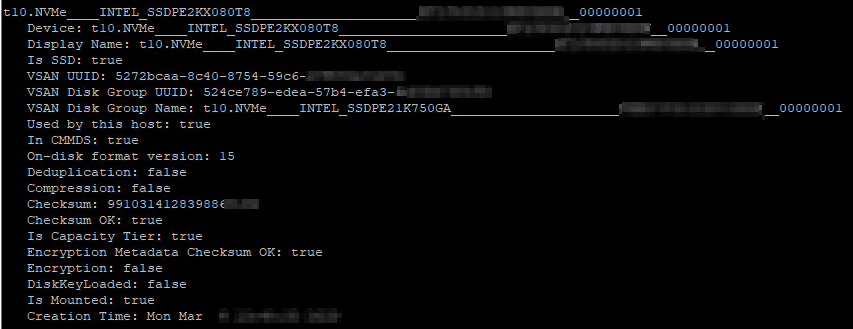
We receive a list of all disk devices in the vSAN node. We also receive the UUID of the disk group to which the device is assigned.
If you take a closer look at the output, you will notice that there are some devices whose UUID is identical to the UUID of the diskgroup. Is this a contradiction to the statement that the UUID is unique? No. These are cache devices. Each diskgroup in vSAN OSA consists of exactly one cache device. The disk group adopts the UUID of its cache device. In this way, we can quickly distinguish a cache device from a capacity device.
Continue reading “Teach-The-Expert: vSAN Diskgroup Management on CLI”