

VMware vSphere and other products from the VMware ecosphere highly rely on DNS resolution. Name resolution is crucial to the virtual world and there’s a rule amongst troubleshooters:
“If you’ve ruled out DNS as the origin of your problem – check DNS again.”
In the corporate sector there are usually DNS servers of various types. Either hardware appliances with DNS functionality, or entire Microsoft Active Directory servers. However, if you want to set up a homelab, your office usually has only a small DSL router with a (poor) DHCP server functionality. It is possible to run DNS servers or whole ADS domain controllers inside a VM, but then we have the chicken and egg problem. The VM will start after cluster and vCenter are online. Until then wild things can happen in a vSphere cluster without DNS. So we are looking for a small, energy-saving, inexpensive and configurable hardware solution as DNS server for our homelab. Sounds like the Swiss-Army knive, but it can be easily realized with a Raspberry Pi.
In this article I will explain what you need to build your DNS server and how to configure a subnet for the lab.
Raspi as DNS-server
For this project we don’t need the latest model of the Raspberry Pi. A Raspi 3b model is fine for this purpose and the accessories are also available at low prices.
| Raspberry Pi 3b+ / 1GB / 4-Core / 1,4 GHz | 35 € |
| Micro SD card 32 GB | 9 € |
| Case (optional) | 8 € |
| Power supply 2,5A (optional) | 10 € |
| HDMI cable | 5 € |
For much less than 100€ you’ll get a tiny server which can also fulfill other tasks like home automization or as ad-blocker pi-hole.
There are a few things to consider. In principle you can power the Raspi via USB. But you have to make sure that the source delivers at least and reliably 1.2A. Power sources with 2.5A are recommended. My first boot attempts failed because my USB power supply did not provide enough power.
The Raspi requires a micro-SD card as permanent boot and storage media. Here you shouldn’t take the cheapest product, but for less than 10 € you can get 32 GB from a trustworthy brand.
Setup base system
Since there is no boot CD or similar for the Raspi, the Micro-SD card must be flashed externally with the OS. We’ll use Raspberry Pi OS (formerly Raspbian) as operating system. This is basically a Debian for ARM architecture. With a small USB to Mico-SD adapter, or a SD card slot in your workstation, you can flash the Micro-SD card with the ISO. A very good tool for this is balenaEtcher, which is available for MacOS, Linux and Windows. The tool is very simple. Select image ISO, choose target medium and flash. Then insert the Micro-SD card into the Raspi’s card slot, connect monitor, LAN, mouse and keyboard and power-on. The hardware will be discovered automatically and the LAN interface obtains an address via DHCP (if available). The wizard will ask for keyboard layout, language settings and an admin user.
It’s convenient to have a monitor connected during base setup. Later changes can be done by SSH.
Base Config
First we should apply latest patches. With Debian/Ubuntu we can use the convenient apt command. First we query update repositories for new updates. All administrative tasks need to be executed with elevated privileges. We’ll need to use sudo before each command to elevate privileges.
pi@raspberrypi:~ $ sudo apt-get update
Get:1 http://raspbian.raspberrypi.org/raspbian buster InRelease [15.0 kB]
Get:2 http://archive.raspberrypi.org/debian buster InRelease [32.6 kB]
Get:3 http://raspbian.raspberrypi.org/raspbian buster/main armhf Packages [13.0 MB]
Get:4 http://archive.raspberrypi.org/debian buster/main armhf Packages [330 kB]
Get:5 http://raspbian.raspberrypi.org/raspbian buster/contrib armhf Packages [58.7 kB]
Get:6 http://raspbian.raspberrypi.org/raspbian buster/non-free armhf Packages [104 kB]
Fetched 13.5 MB in 9s (1,485 kB/s)
Reading package lists… Done
Second step is to apply patches while apt cares for packet dependencies.
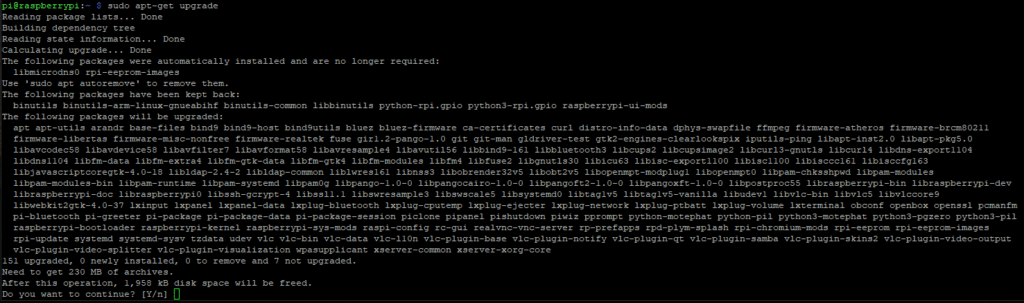
sudo apt-get upgrade
You’ll see a longer list of packets available for update. The picture below shows an example output. Just confirm the question with [y] and let apt do the rest. The update procedure might take a couple of minutes.
Assign static IP
For our homelab we need a dedicated subnet, which will be served by the DNS on Raspi. I chose subnet 10.0.10.0/24. It will be used for all hosts, vCenter and infrastructure appliances. Gateway address is 10.0.10.1. DNS on Raspi will get 10.0.10.2 (static). Besides DNS our Raspi will be responsible for timesync too.
sudo nano /etc/dhcpcd.conf
Look for entry # Example static IP configuration. Add the lines below or uncomment (#) existing lines.
# Example static IP configuration:
interface eth0
static ip_address=10.0.10.2/24
static routers=10.0.10.1
static domain_name_servers=10.0.10.2 fd51:42f8:caae:d92e::1
Save settings with [Ctrl] + [o] and exit editor with [Ctrl] + [x]. Reboot Raspi.
sudo reboot
Configure Raspi as time source
Sudo apt-get install ntp
Check service with sntp command.
pi@raspberrypi:/etc $ sntp --version
sntp 4.2.8p12@1.3728-o (1)
You can edit upstream time servers in ntp.conf.
sudo nano /etc/ntp.conf
It’s a good idea to enter regional pool servers close to your location. In this example I’m using european pool servers. You can find servers in your region on the NTP-Pool-Project website.
server 0.europe.pool.ntp.org
server 1.europe.pool.ntp.org
server 2.europe.pool.ntp.org
server 3.europe.pool.ntp.org
Save the config with [Ctrl] + [o] and exit editor with [Ctrl] + [x]. The NTP service needs to be restarted to commit changes.
sudo service ntp restart
Check configuration:
sudo service ntp status

Our NTP service can respond to external queries too. You can test from a Windows server for example with w32tm command.
w32tm /stripchart /computer:10.0.10.2 /dataonly /samples:5