With the release of vSphere 7.0 Update 1, vSphere Cluster Services VMs (vCLS) appeared in vSphere clusters for the first time. This made cluster functions such as Distributed Resource Scheduler (DRS) and others independent of the availability of the vCenter Server Appliance (VCSA) for the first time. The latter still represents a single point of failure in the cluster. By outsourcing the DRS function to the redundant vCLS machines, a higher degree of resilience has been achieved.
Retreat Mode
The vSphere administrator has little influence on the provisioning of these VMs. Occasionally, however, it is necessary to remove these VMs from a datastore if it is to be put into maintenance mode, for example. There is a procedure for setting the cluster to retreat mode. This involves setting temporary advanced settings that lead to the deletion of the vCLS VMs by the cluster.
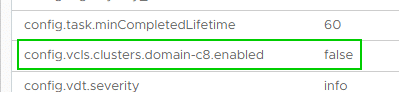
According to the VMware procedure, the Domain ID must be determined to activate Retreat Mode. The domain ID is the numerical value between ‘domain-c’ and the following colon. In the example from my lab, it has the value 8, but the number can also have four digits or more.
The domain ID has to be transferred to the Advanced Settings of the vCenter.
config.vcls.clusters.domain-c8.enabled = false
Correct Retreat Mode settings.
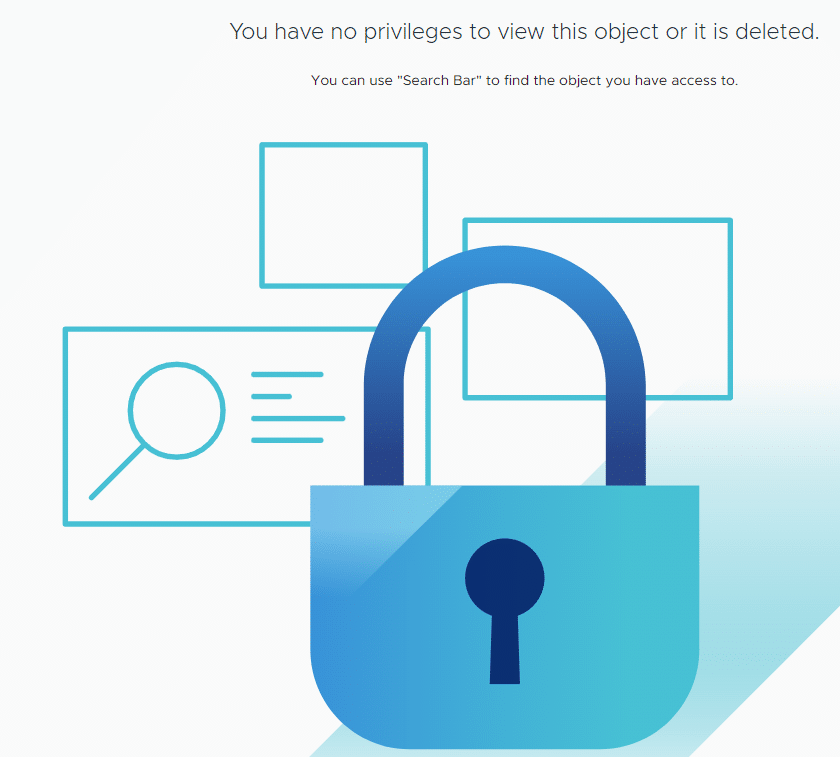
Admin error occured during activation of retreat mode.
After activating retreat mode on a vSAN cluster, administrators had lost all privileges to all objects in the vSphere Client.
A review of the services showed that the vCenter Server Daemon (vpxd) was not running.
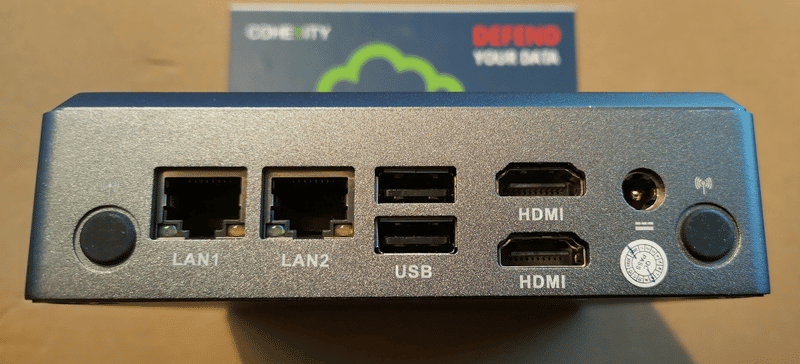
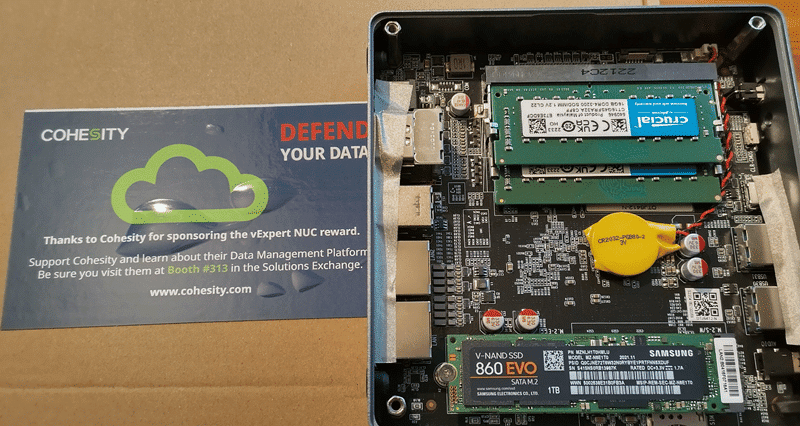
I recently became the owner of a Maxtang NX6412-B11 Mini PC. Cohesity gave away these barebones to vExperts at the VMware Explore EMEA in Barcelona. Once again a big thank you to Cohesity for their support of the community!
The fanless MiniPC with Elkhart Lake chipset is well-equipped. It has 2x 1 Gbit LAN, 1x USB-C (front), 2x USB 3.2 (front), 2x USB 2.0, 2x HDMI 2.0, and an audio jack.
Featured ports on the rear side.
The MiniPC will be a great addition to my homelab. I had intended to install the Tanzu community edition for it. Unfortunately, the project has since been discontinued by VMware and the removal of the packages from GitHub has been announced. 🙁
Hardware finish
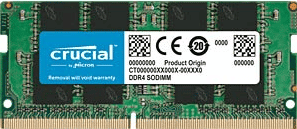
The barebone still had to be provided with RAM and a flash disk. I installed a Samsung SSD 860 EVO Series 1TB M.2 SATA and two SO-DIMM DDR4 3200 16 GB from Crucial.
Reboot Issues with Linux
With the SATA SSD and the RAM, the machine was ready to boot. Ubuntu 22.04 LTS was used as operating system. After installation, a usual reboot was requested. However, the PC did not shut down completely and remained in the “Reached target shutdown” state. The PC had to be powered off hard. The reboot also took several minutes, which is very unusual for Ubuntu. To rule out the possibility that the problem is specific to Ubuntu, I tried an installation with Fedora. The result was exactly the same here too.
The solution
After a lengthy search, I found a clue that was specific to the EHL hardware platform. The fix is to disable a kernel module for the Intel Elkhart Lake SoC chipset. This can be done by adding it to the blacklist.conf file.
sudo vi /etc/modprobe.d/blacklist.conf
The line below must be added to blacklist.conf:
blacklist pinctrl_elkhartlake
Quit the vi editor with [ESC] [:] wq! (save and exit)
update-initramfs –u
The next shutdown was still delayed, but after a cold boot the OS came up within a few seconds.
I hope this hint helps someone – especially my vExpert colleagues who received the Cohesity gift too. Sharing is caring. 🙂
You don’t need an enterprise cluster in order to get an impression of VMware Tanzu and Kubernetes. Thanks to the Tanzu Community Edition (TCE), now anyone can try it out for themselves – for free. The functionality offered is not limited in comparison to commercial Tanzu versions. The only thing you don’t get with TCE is professional support from VMware. Support is provided by the community via forums, Slack groups or Github. This is perfectly sufficient for a PoC cluster or the CKA exam training.
Deployment is pretty fast and after a couple of minutes you will have a functional Tanzu cluster.
TCE Architecture
The TCE can be deployed in two variants either as a standalone cluster or as a managed cluster.
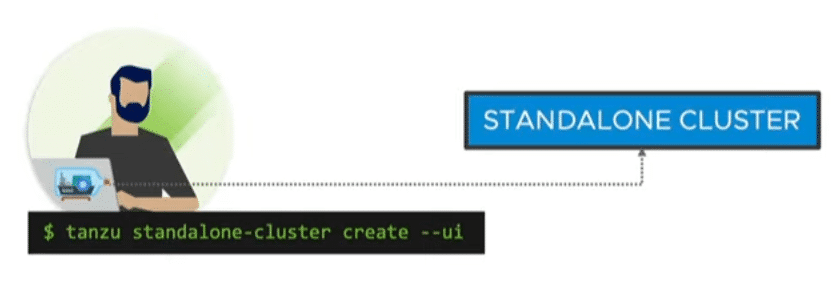
Standalone Cluster
A fast and resource-efficient way of deployment without a management cluster. Ideal for small tests and demos. The standalone cluster offers no lifecycle management. Instead, it has a small footprint and can also be used on small environments.
Source: VMware
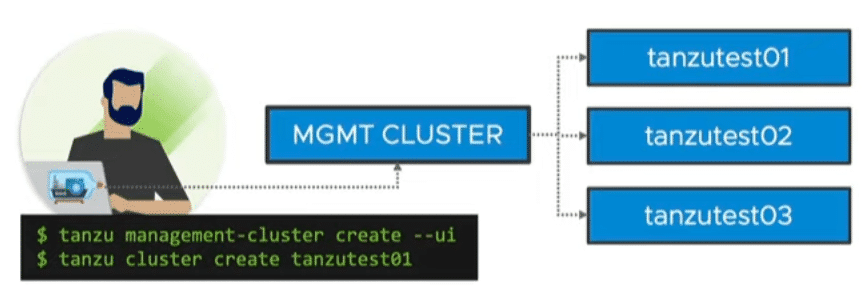
Managed Cluster
Like commercial Tanzu versions, there is a management cluster and 1 to n workload clusters. It comes with lifecycle management and cluster API. Thus, declarative configuration files can be used to define your Kubernetes cluster. For example, the number of nodes in the management cluster, the number of worker nodes, the version of the Ubuntu image or the Kubernetes version. Cluster API ensures compliance with the declaration. For example, if a worker node fails, it will be replaced automatically.
By using multiple nodes, the managed cluster of course also requires considerably more resources.
Source: VMware
Deployment options
TCE can be deployed either locally on a workstation by using Docker, in your own lab/datacenter on vSphere, or in the cloud on Azure or aws.
I have a licensed Tanzu with vSAN and NSX-T integration up and running in my lab. So TCE on vSphere would not really make sense here. Cloud resources on aws or Azure are expensive. Therefore, I would like to describe the smallest possible and most economical deployment of a standalone cluster using Docker. To do so, I will use a VM on VMware workstation. Alternatively, a VMware player or any other kind of hypervisor can be used.
With vSphere7 fundamental changes in the structure of the ESXi boot medium were introduced. A fixed partition structure had to give way to a more flexible partitioning. More about this later.
With vSphere 7 Update 3 VMware also brought bad news for those using USB or SDCard flash media as boot devices. Increasing read and write activity led to rapid aging and failure of these types of media, as they were never designed to handle such a heavy load profile. VMware put these media on the red list and the vSphere Client throws warning messages in case such a media is still in use. We will explore how to replace USB or SDCard boot media.
ESXi Boot Medium: Past and Present
In the past, up to version 6.x, the boot medium was rather static. Once the boot process was complete, the medium was no longer important. At most, there was an occasional read request from a VM to the VM Tools directory. Even a medium that broke during operation did not affect the ESXi host. Only a reboot caused problems. For example, it was still possible to backup the current ESXi configuration even if the boot medium was damaged.
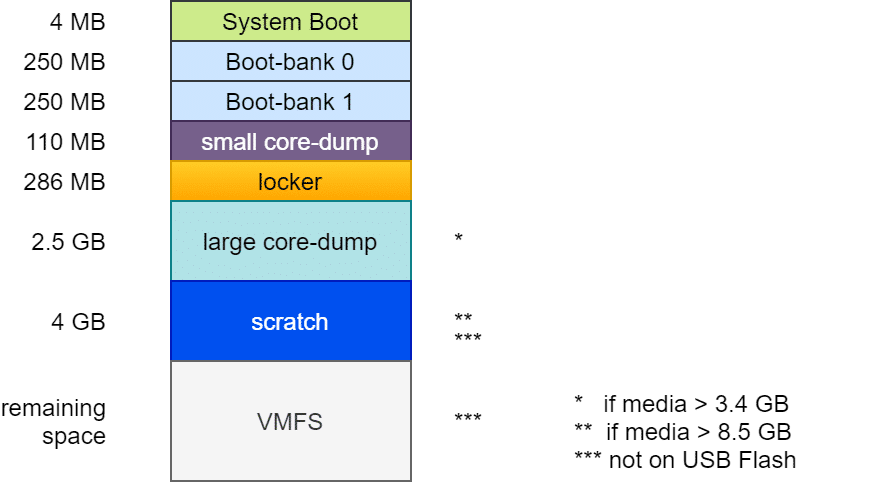
Layout of an ESXi Boot media before version 7
Layout of the boot media up to ESXi 6.7
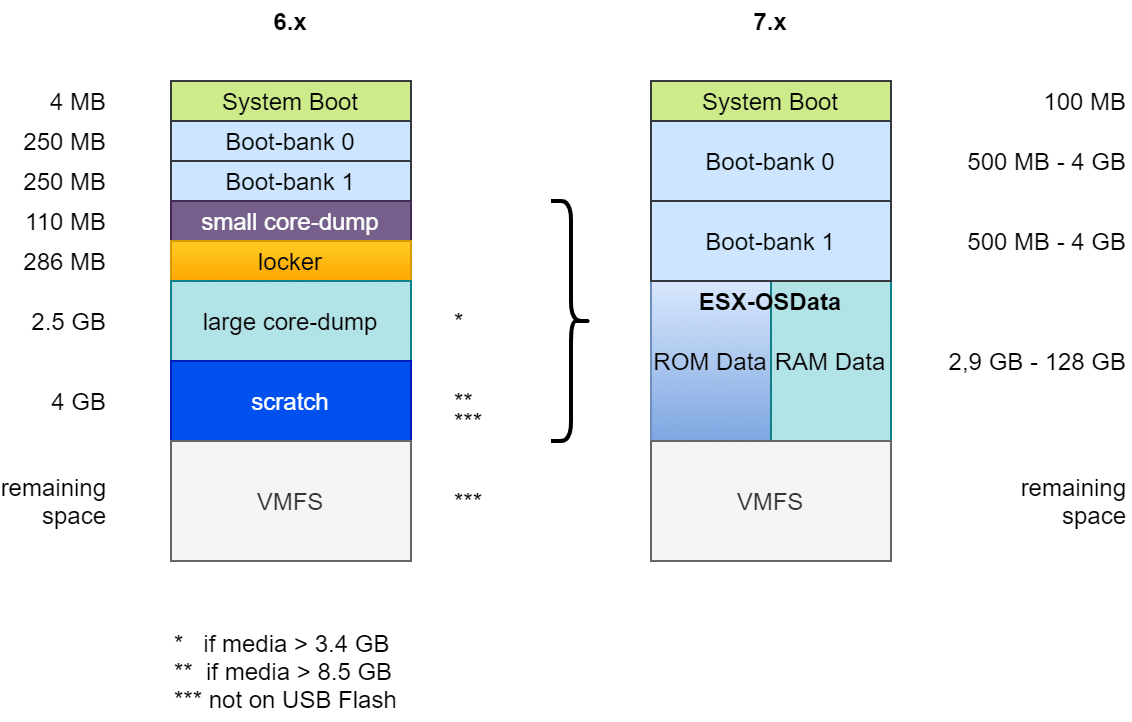
In principle, the structure was nearly always the same: A boot loader of 4 MB size (FAT16), followed by two boot banks of 250 MB each. These contain the compressed kernel modules, which are unpacked and loaded into RAM at system boot. A second boot bank allows a rollback in case of a failed update. This is followed by a “Diagnostic Partition” of 110 MB for small coredumps in case of a PSOD. The Locker or Store partition contains e.g. ISO images with VM tools for all supported guest OS. From here VM tools are mounted into the guest VM. A common source of errors during the tools installation was a damaged or lost locker directory.
The subsequent partitions differ depending on the size and type of the boot media. The second diagnostic partition of 2.5 GB was only created if the boot medium is at least 3.4 GB (4MB + 250MB + 250MB + 110MB + 286MB = 900MB). Together with the 2.5 GB of the second diagnostic partition, this requires 3.4 GB.
A 4 GB scratch partition was created only on media with at least 8.5 GB. It contains information for VMware support. Anything above that was provisioned as VMFS data store. However, scratch and VMFS partition were created only if the media was not USB flash or SDCard storage. In this case, the scratch partition was created in the host’s RAM. With the consequence that in the event of a host crash, all information valuable for support was lost as well.
Structure of the boot media from ESXi 7 onwards
The layout outlined above made it difficult to use large modules or third-party modules. Hence, the design of the boot medium had to be changed fundamentally.
Changes of the partition layout between version 6.x and 7.x
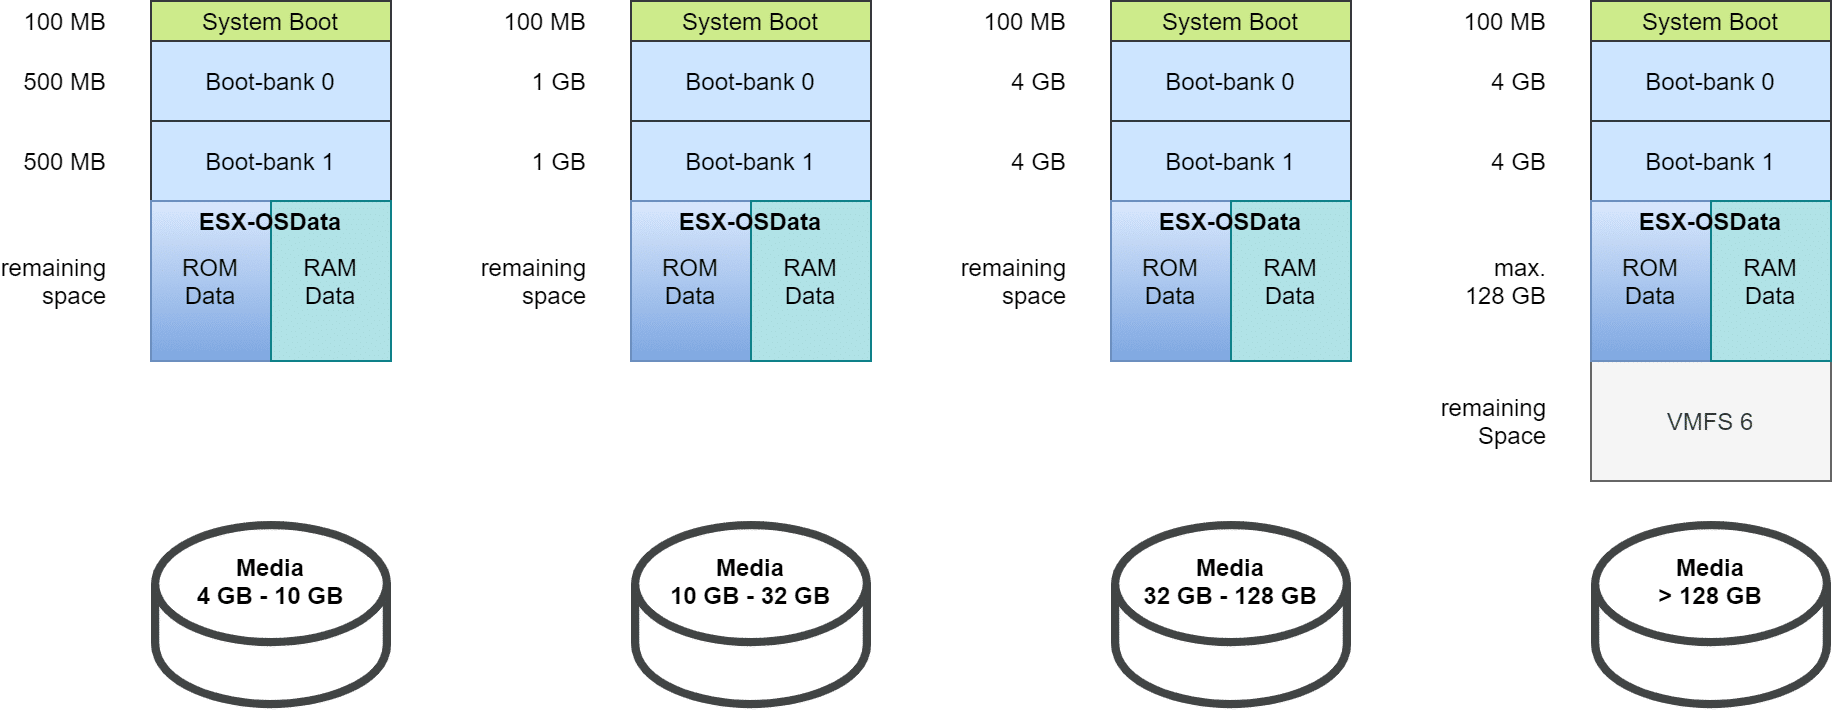
First, the boot partition was increased from 4 MB to 100 MB. The two boot banks were also increased to at least 500 MB. The size is flexible, depending on the total size of the medium. The two diagnostic partitions (Small Core Dump and Large Core Dump), as well as Locker and Scratch have been merged into a common ESX-OSData partition with flexible size between 2.9 GB and 128 GB. Remaining space can be optionally provisioned as VMFS-6 datastore.
There are four different boot media size classes in vSphere 7:
4 GB – 10 GB
10 GB – 32 GB
32 GB – 128 GB
> 128 GB
Dynamic partitioning in vSphere 7 depending on media capacity.
The partition sizes shown above are for freshly installed boot media on ESXi 7.0, but what about boot media migrated from version 6.7?