
First aid if VCSA root partition turns out to be too small
I recent times I frequently see vCenter server appliances (VCSA), whose root partitions ran out of free space. As a result services are unable to start after reboot. There are some tricks to free some space on root but on the long run you should increase the partition size.
Sounds simple – but it’s quite tricky and a bit dangerous. Don’t try this at home! 😉
Procedure
Find out device
We first have to find out, on which device our root partition is located.
lsblk
vc:~ # lsblk
 NAME MAJ:MIN RM SIZE RO MOUNTPOINT
 sda 8:0 0 20G 0
 ├─sda1 8:1 0 132M 0 /boot
 ├─sda2 8:2 0 1G 0 [SWAP]
 └─sda3 8:3 0 10.9G 0 /
 sdb 8:16 0 1.4G 0
 sdc 8:32 0 25G 0
 └─swap_vg-swap1 (dm-8) 253:8 0 25G 0 [SWAP]
 sdd 8:48 0 50G 0
 └─core_vg-core (dm-7) 253:7 0 50G 0 /storage/core
 sde 8:64 0 10G 0
 └─log_vg-log (dm-6) 253:6 0 10G 0 /storage/log
 sdf 8:80 0 10G 0
 └─db_vg-db (dm-5) 253:5 0 10G 0 /storage/db
 sdg 8:96 0 5G 0
 └─dblog_vg-dblog (dm-4) 253:4 0 5G 0 /storage/dblog
 sdh 8:112 0 25G 0
 └─seat_vg-seat (dm-3) 253:3 0 25G 0 /storage/seat
 sdi 8:128 0 1G 0
 └─netdump_vg-netdump (dm-2) 253:2 0 1016M 0 /storage/netdump
 sdj 8:144 0 10G 0
 └─autodeploy_vg-autodeploy (dm-1) 253:1 0 10G 0 /storage/autodeploy
 sdk 8:160 0 10G 0
 └─invsvc_vg-invsvc (dm-0) 253:0 0 10G 0 /storage/invsvc
 fd0 2:0 1 4K 0
 sr0 11:0 1 1024M 0
As we can see it is located on sda3. Now we have to find the corresponding SCSI node.
lsscsi
vc:~ # lsscsi
 [0:0:0:0] disk VMware Virtual disk 1.0 /dev/sda
 [0:0:1:0] disk VMware Virtual disk 1.0 /dev/sdb
 [0:0:2:0] disk VMware Virtual disk 1.0 /dev/sdc
 [0:0:3:0] disk VMware Virtual disk 1.0 /dev/sdd
 [0:0:4:0] disk VMware Virtual disk 1.0 /dev/sde
 [0:0:5:0] disk VMware Virtual disk 1.0 /dev/sdf
 [0:0:6:0] disk VMware Virtual disk 1.0 /dev/sdg
 [0:0:8:0] disk VMware Virtual disk 1.0 /dev/sdh
 [0:0:10:0] disk VMware Virtual disk 1.0 /dev/sdi
 [0:0:12:0] disk VMware Virtual disk 1.0 /dev/sdj
 [0:0:14:0] disk VMware Virtual disk 1.0 /dev/sdk
 [1:0:0:0] cd/dvd NECVMWar VMware IDE CDR00 1.00 /dev/sr0
We can see sda is on the first SCSI node (which is not surprising).
Increase VMDK size
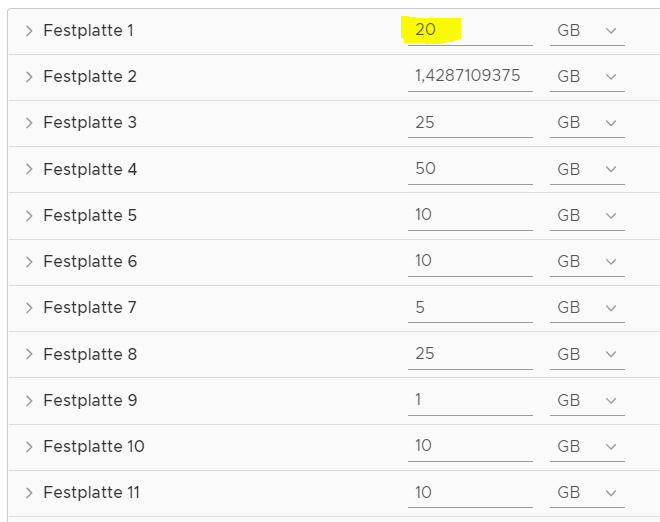
The default size of vDisk1 is 11 GB. We will enlarge that to 20 GB. At this point our VM mustn’t have a snapshot. Handy functions like LVM and autogrow don’t work on the root partition.
We need to restart the VM to apply changed sizes of vDisk1.
shutdown -r now
Let’s have a look on device sda
fdisk -l /dev/sda
vc:~ # fdisk -l /dev/sda

Disk /dev/sda: 21.5 GB, 21474836480 bytes
 255 heads, 63 sectors/track, 2610 cylinders, total 41943040 sectors
 Units = sectors of 1 * 512 = 512 bytes
 Sector size (logical/physical): 512 bytes / 512 bytes
 I/O size (minimum/optimal): 512 bytes / 512 bytes
 Disk identifier: 0x547c469c

Device Boot Start End Blocks Id System
 /dev/sda1 2048 272383 135168 83 Linux
 /dev/sda2 272384 2377727 1052672 82 Linux swap / Solaris
 /dev/sda3 * 2377728 25165823 11394048 83 Linux
An asterisk indicates sda a bootable device.
How much free space do we have?
df -h
vc:~ # df -h
 Filesystem Size Used Avail Use% Mounted on
 /dev/sda3 11G 5.1G 5.1G 51% /
 udev 7.9G 164K 7.9G 1% /dev
 tmpfs 7.9G 40K 7.9G 1% /dev/shm
 /dev/sda1 128M 38M 84M 31% /boot
 /dev/mapper/core_vg-core 50G 185M 47G 1% /storage/core
 /dev/mapper/log_vg-log 9.9G 8.7G 695M 93% /storage/log
 /dev/mapper/db_vg-db 9.9G 4.0G 5.4G 43% /storage/db
 /dev/mapper/dblog_vg-dblog 5.0G 2.8G 1.9G 60% /storage/dblog
 /dev/mapper/seat_vg-seat 25G 20G 4.1G 83% /storage/seat
 /dev/mapper/netdump_vg-netdump 1001M 18M 932M 2% /storage/netdump
 /dev/mapper/autodeploy_vg-autodeploy 9.9G 151M 9.2G 2% /storage/autodeploy
 /dev/mapper/invsvc_vg-invsvc 9.9G 297M 9.1G 4% /storage/invsvc
The size of sda is still 11GB, yet the disk is bigger.
Danger!
Now it’s time to make a snapshot of the VM. Those of you who are using Veeam Backup & Replication should also create a replicate of vCenter.
Use all instruction on your own risk
We’re going to destroy partition sda3 and rebuild it in new boundaries. If something goes wrong, your vCenter is lost. Read the last sentence again.
Delete partition sda3
fdisk /dev/sda
Partition /dev/sda3 will be deleted by pressing [d] and partition number [3].
Command (m for help): d

Partition number: 3
Partition table hasn’t been written yet. It is still possible to cancel with Ctrl-C.
Rebuild partition
Now we’ll create a new partition [n]. Type is primary [p]. Number is [3]. From now on we accept default values.
Command (m for help): n

Command action
e extended
p primary partition (1-4)
p
3
Make sda3 bootable
The new partition sda3 is not yet bootable. We can achieve that by setting the bootable flag [a] and choose partition number [3].
Command (m for help): a

Partition number (1-4): 3
Check partition table
With the command print [p] we can have a look at the partition table.
Command (m for help): p
Write table
It’s time to make changes persistent by writing our changes [w].
Command (m for help): w
We need a reboot to apply changes.
shutdown -r now
After reboot we can reconnect by SSH or console.
The filesystem still has its old size. Only the partition has grown. We can change that by resize2fs.
resize2fs /dev/sda3
Check filesystem
df -h /dev/sda3
Last step
If everything works as expected, don’t forget to delete the snapshot. 😉