Recently I’ve upgraded my homelab from 6.7U3 to vSphere7. The workflow is straightforward and very easy. The VMware Design team did a very good job with the UI.
First steps
I cannot point that out enough: check the VMware HCL. Just because your system is supported under your current vSphere version, doesn’t mean it’ll be supported under vSphere7 too. On the day I’ve upgraded, vSphere7 was brand new and there were just a few entries in the HCL. But it’s a homelab and if something breaks I don’t care to rebuild it from scratch. Don’t do this in production!
Although my Supermicro E300-9D is not yet certified for version 7.0, it works like a charm. I guess it’s just a matter of time, because the VMware Nano-Edge cluster is based on that hardware.
Before we can start, you need to download the vCenter Server Appliance 7.0 (VCSA) from VMware downloads (Login required). You also need to have new license keys for vCenter, ESXi and vSAN (if yor cluster is hyperconverged).
Begin upgrade
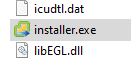
Mount the VCSA ISO file to your Windows, Mac or Linux workstation. Navigate to folder vcsa-ui-installer and choose your operating system (lin64, mac or win32). For setup from Windows start the installer.exe in subfolder win32.
Now you’ll see four options:
- Install – This is for greenfield setup. No upgrade.
- Upgrade – To upgrade an existing vCenter appliance
- Migrate – Cross migrate a Windows vCenter to VCSA. Windows vCenters are no longer supported.
- Restore – If you’ve lost or messed up your VCSA 7.0, this is the way to restore it.
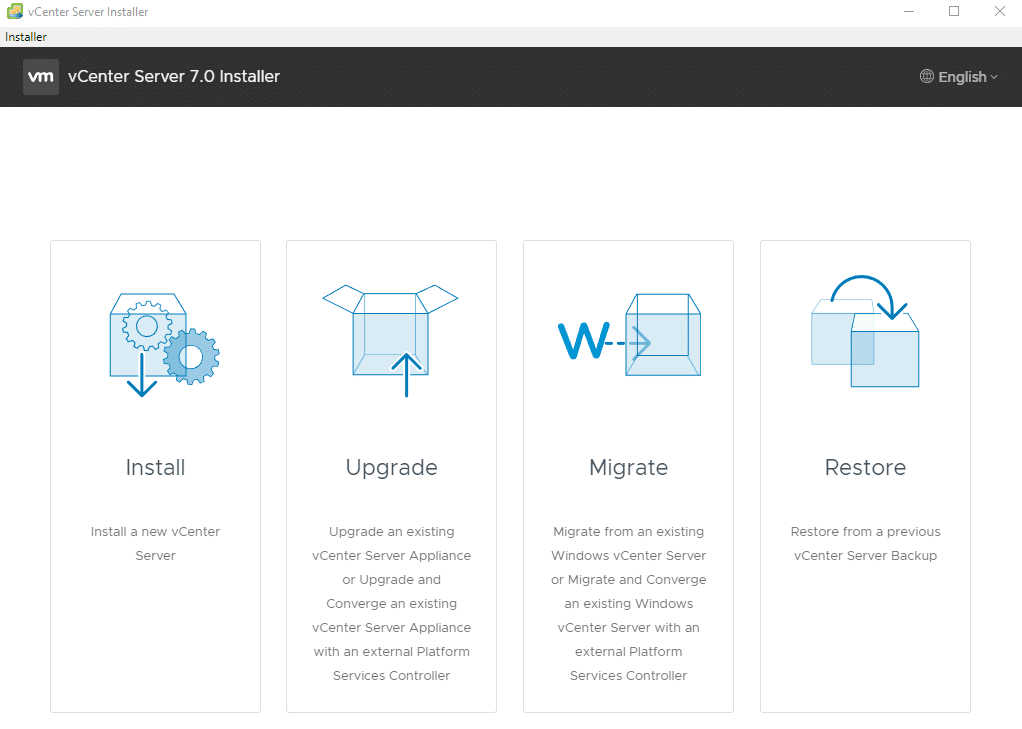
The most common use case is an upgrade VCSA 6.5 or 6.7 to VCSA 7.0. Note that there’s no direct upgrade path from VCSA 6.0 to VCSA7.
In my case it was VCSA 6.7U3 to 7.0 with embedded Platform Service Controller (PSC) which is fully supported.
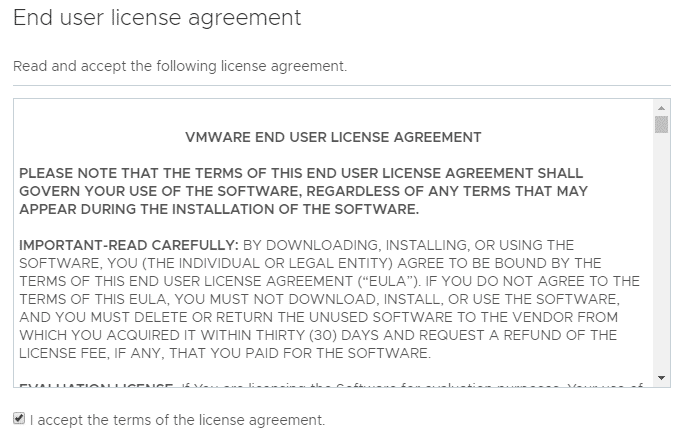
Read and accept the EULA and click ‘Next’.
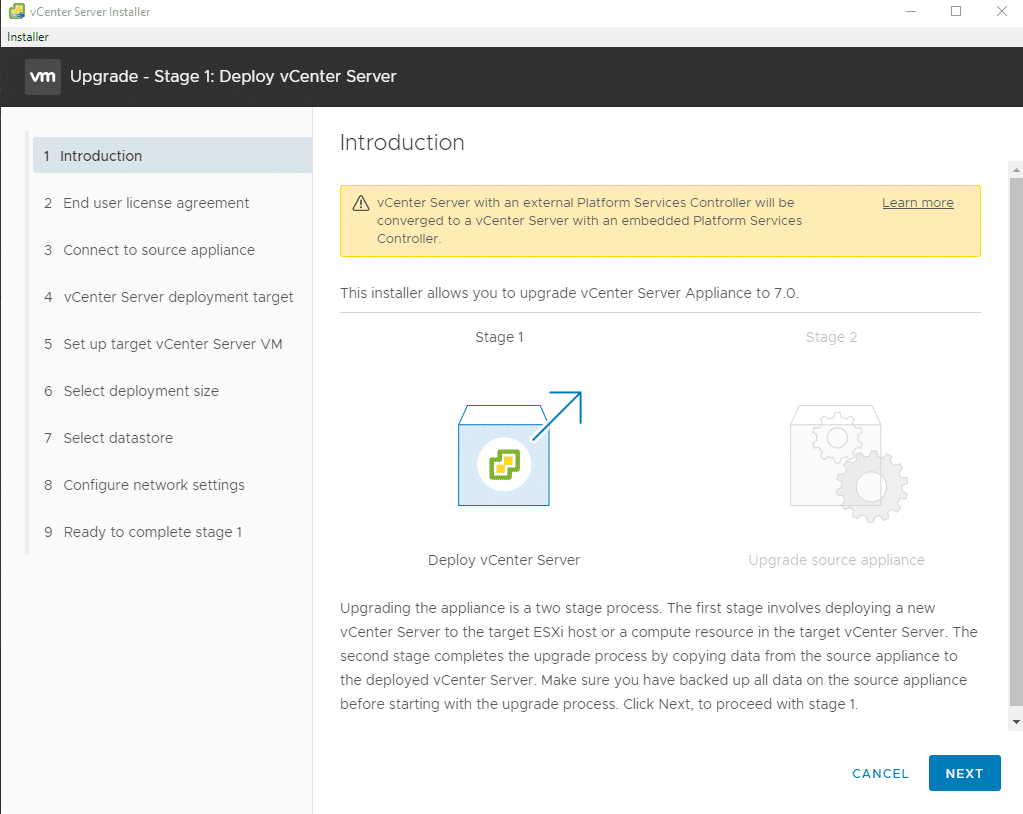
During the Upgrade process we’ll deploy a new VCSA 7.0 with a tempoary IP address. The new appliance will collect all settings from the previous VCSA and take over its role. There’s no in-place upgrade, but it has the advantage that you’ll keep your old vCenter in case something breaks on the way.
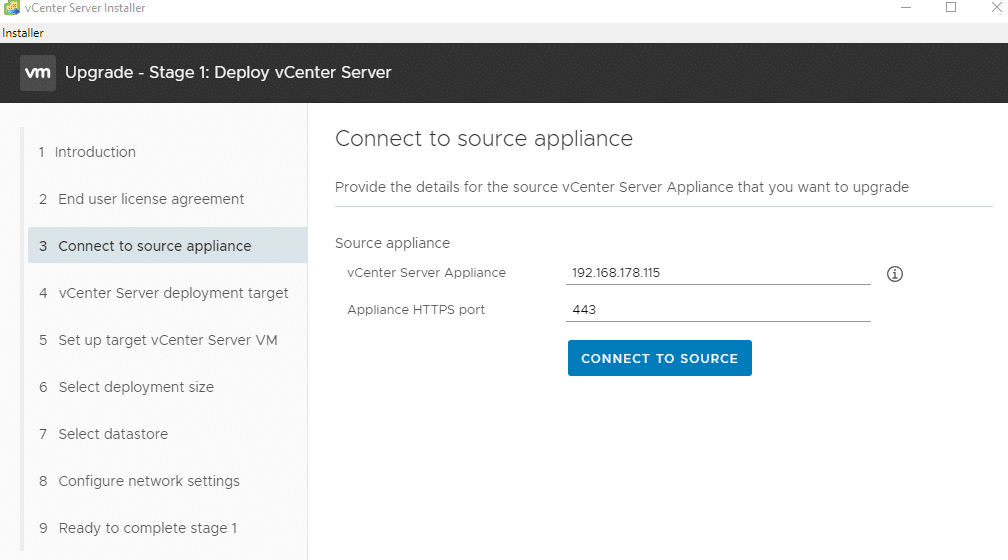
Provide login credentials for the old vCenter server and the ESXi host that currently manages the old vCenter. It’s a good idea to set DRS to semi-automatic or manual. So you’ll make sure that your old vCenter doesn’t get migrated during upgrade.
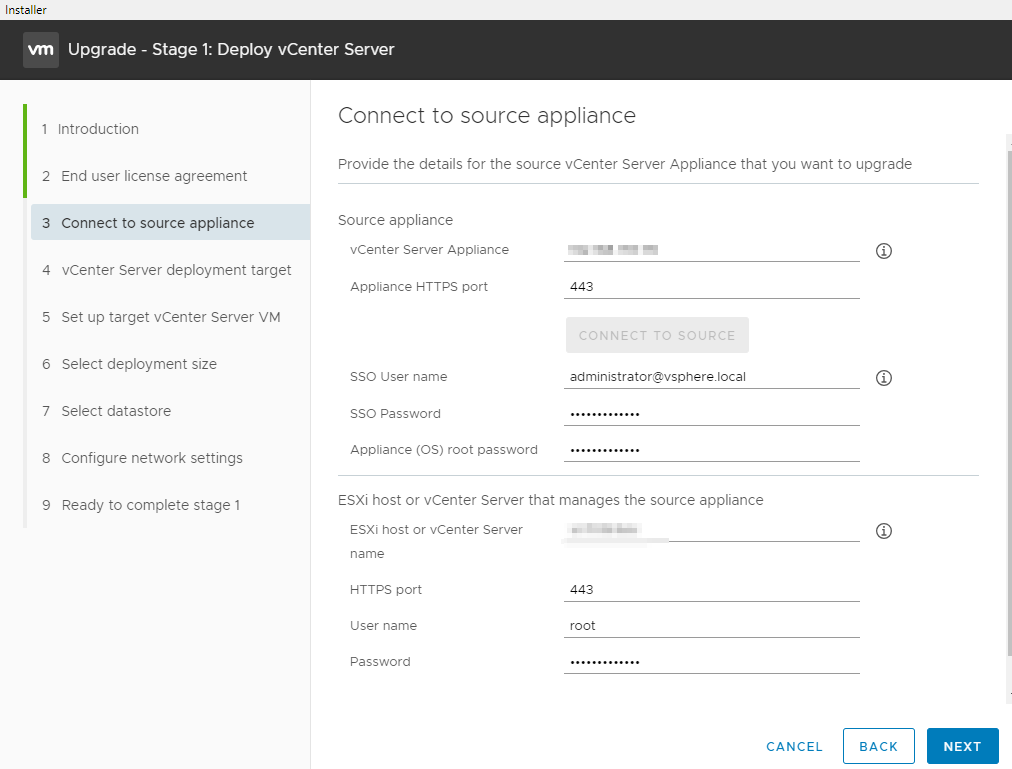
This warning will be displayed if you’re using self signed certificates.

Now we need to select a target ESXi host for the new appliance.

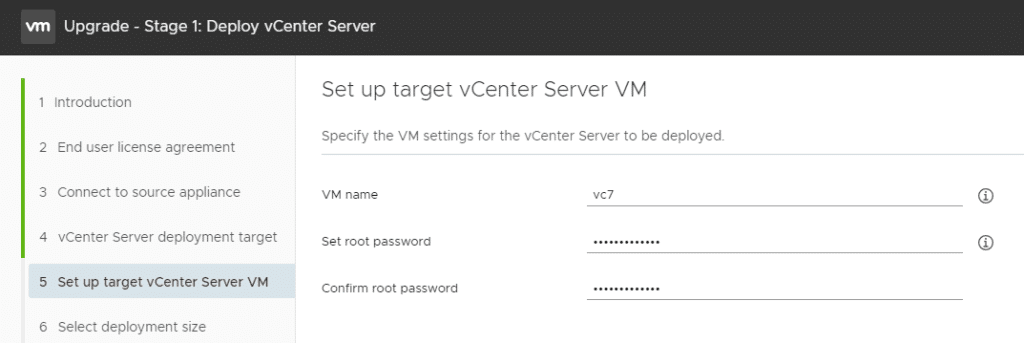
Enter a name for the new VM and set the root password.
Virtual center 7 requires more resources than VCSA 6.x, so even a tiny deployment will need 12 GB and more than 1 TB of disk space.
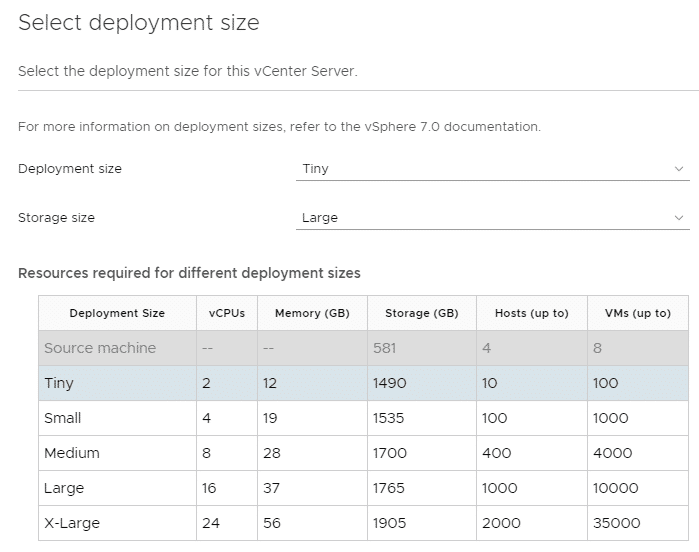
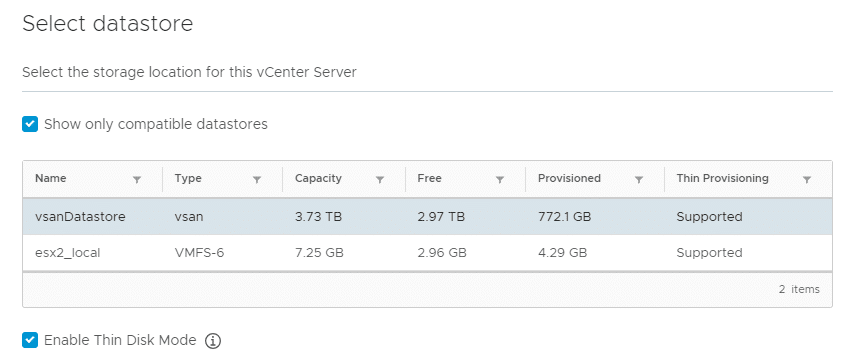
In a lab environment I’d recommend thin disk mode in order not to eat up too much expensive storage capacity. In a vSAN environment there’s only one choice. You cannot select a host local datastore.
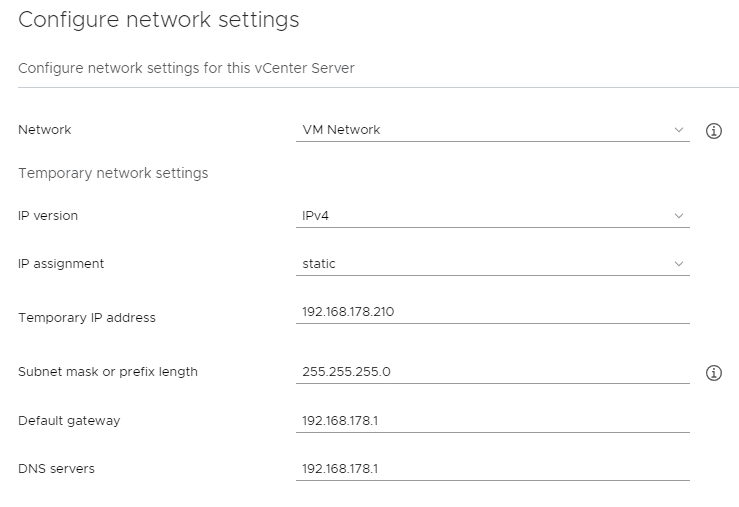
Before deployment we need to provide (temporary) network settings to the new appliance. In the end they will be overwritten by the original settings of the old appliance. You may use DHCP for the temporary IP settings, but I prefer to define the address manually.
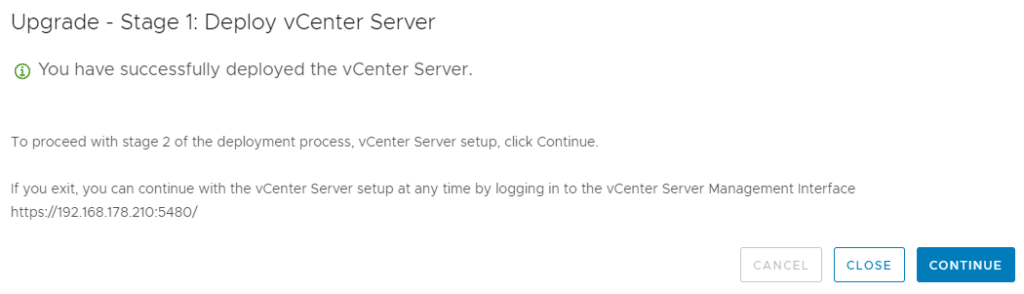
Finally the appliance will be deployed on the defined ESXi host.

Once the new appliance is deployed and running, we’ve accomplished part one of the migration.