
There have been many new releases in the first quarter of 2020. The long anticipated release of Veeam Backup & Replication version 10, we’ve been waiting for since 2017 and also the latest generation of VMware vSphere. While I had vSAN 7 beta running on my homelab cluster before GA, I’ve worked with Veeam Backup 10 only in customer projects. There’s unfortunately no room for playing with new features unless the customer requests it. One of the new features of Veeam v10 is the ability to use Linux proxies and repositories. With XFS filesystem on the repository you can use the fast clone feature which is similar to ReFS on Windows.
In this tutorial I will show how to:
- Deploy and size the Veeam server
- Show base configuration to integrate vCenter
- Build, configure and deploy a Linux proxy and its integration into backup infrastructure
- Build, configure and deploy a Linux XFS repository
Using Veeam Backup on a vSAN Cluster has special design requirements. There’s no direct SAN backup on VMware vSAN because there’s neither a SAN, nor a fabric and nor HBAs. There are only two backup methods available: Network Mode (nbd) and Virtual Appliance Mode (hotadd). The latter is recommended for vSAN, but you should deploy one proxy per host to avoid unnecessary traffic on the vSAN interfaces. Hotadd also utilizes Veeam Advanced Data Fetcher (ADF).
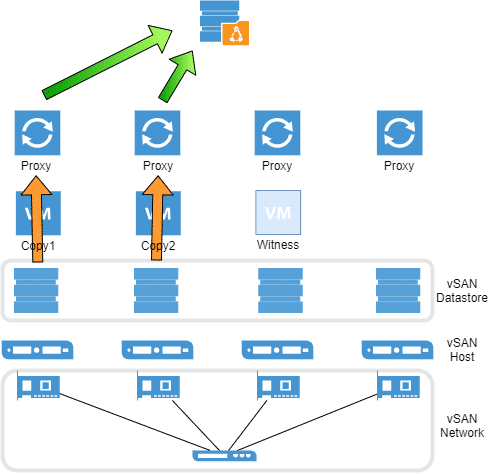
Right: One proxy appliance per vSAN node; Direct data transfer without impact on vSAN network.
Talking about licenses: Having Linux proxies on each host will reduce the cost of Windows licensing. One more reason to play around with this new feature. A Veeam license will be required too, but as a vExpert I can get a NFR (not for resale) license which is valid for one year. Just one of the advantages of being a vExpert. 🙂
Let the games begin. We’ll need a Veeam server that holds the job database and the main application. The proxy and repository role will be kept on individual (Linux) servers.
Building the Veeam server VM
The Veeam server still requires a Windows operating system. So I will set up a VM with Windows Server 2019. Deploying a Windows OS in a VM is rather boring, but there’s a little pitfall when booting the setup ISO image, so I will show the process here. If you’re a pro, please skip to the next section.
Let’s prepare a new VM for the Veeam server.
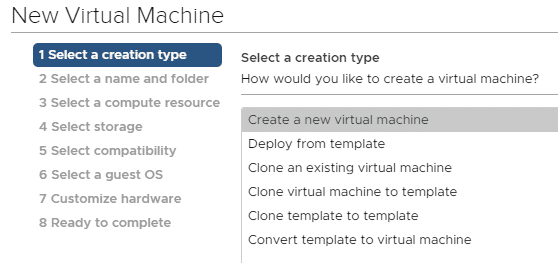
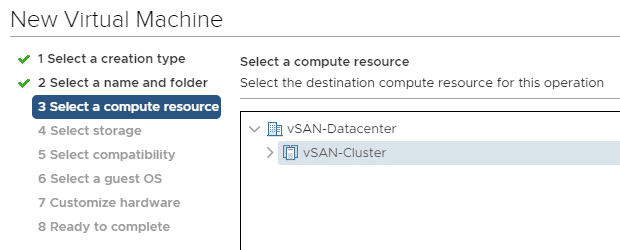
Choose a name, VM folder and a compute cluster.
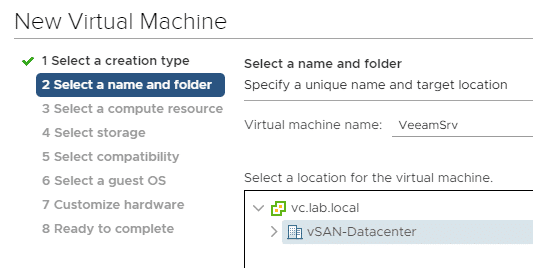
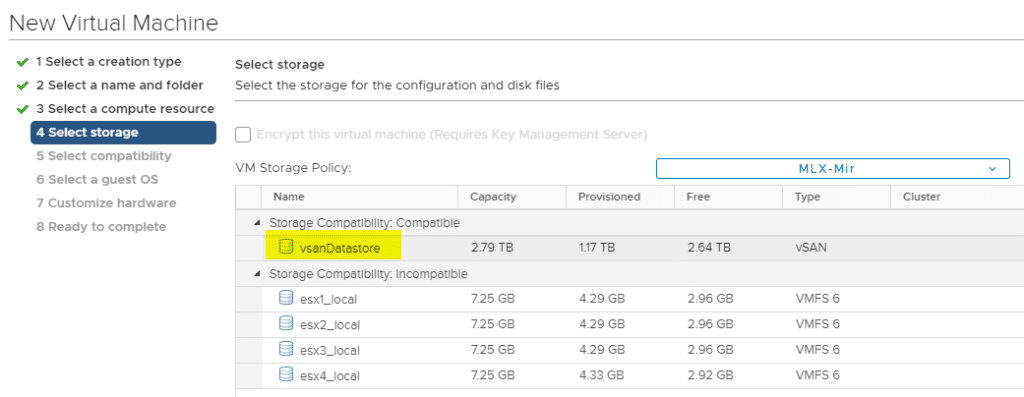
In a vSAN environment there are not too many choices for the datastore. 😉
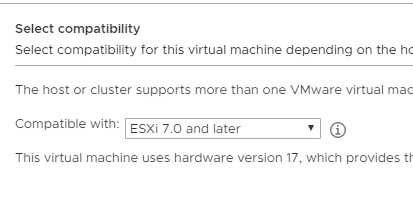
There’s no need for downward compatibility, so let’s take advantage of all the latest vSphere 7 features.
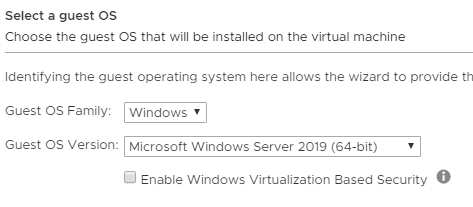
Select OS familiy and guest OS version.
Sizing the VM
In a POC I usually size my VMs to comply with minimum requirements. For a Veeam server without proxy- or repository role that is 2 CPU, 8 GB RAM, 100 GB Disk (thin). In production that would definitely too small. For sizing decisions check Sizing Summary on the Veeam Backup & Replication Best Practice Guide.
Once we’ve built the empty VM, we can mount our setup image.
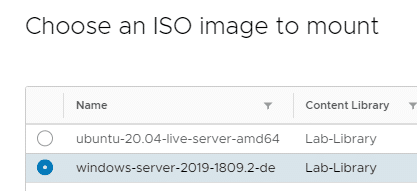
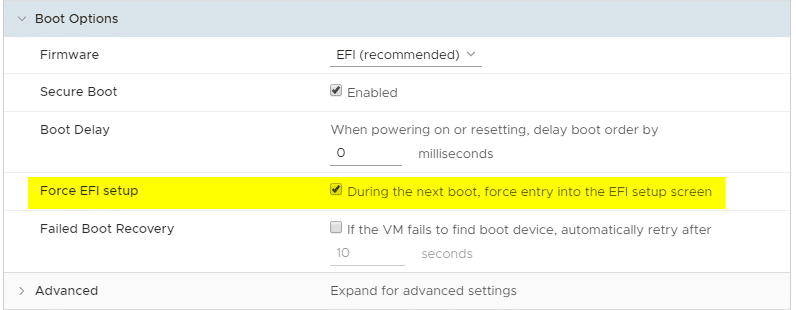
To boot from Windows Server 2019 CDROM, we need to make an adjustment in the boot options of the new VM.
After PowerOn our VM will go straight into the boot manager where we can select the virtual CDROM.
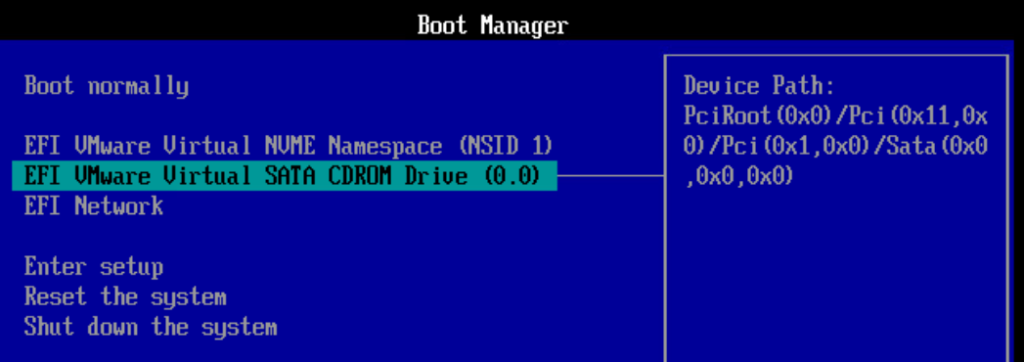
That was the only catch. I will not go into details of a Windows Server 2019 setup. That’s too boring. 😉
Setup Veeam
Veeam setup is very straightforward. Mount the Veeam setup iso image. Leave all values on default. If there are missing Windows components, let the Veeam setup wizard install them for you.
Configure Infrastructure
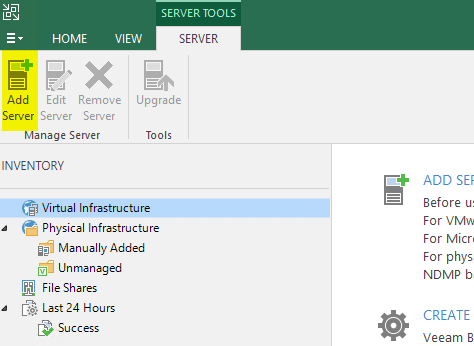
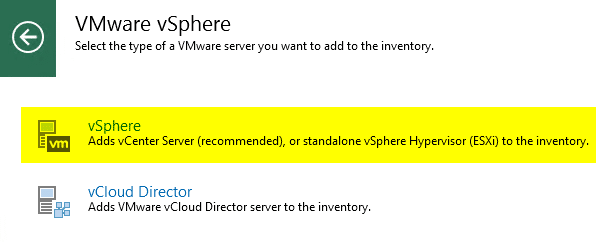
Once we open the Veeam console for the first time after setup we’ll see an empty configuration. Our first step will be adding a vCenter server to the configuration. Go to Inventory > Virtual Infrastructure and add a server (vCenter).

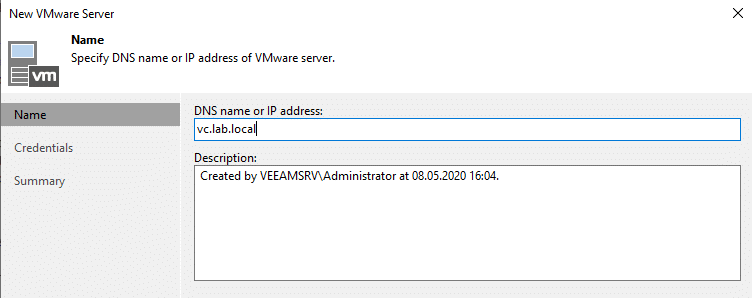
Provide either IP address or FQDN of your vCenter server. Needless to say that DNS lookups and reverse lookups should be properly configured.
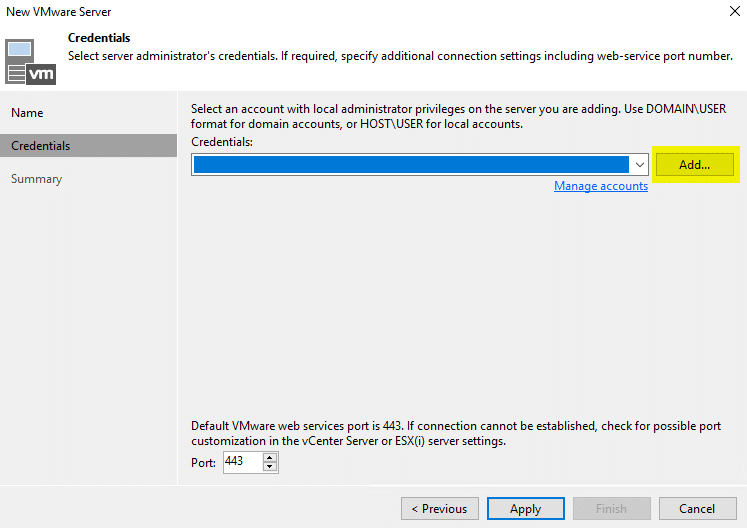
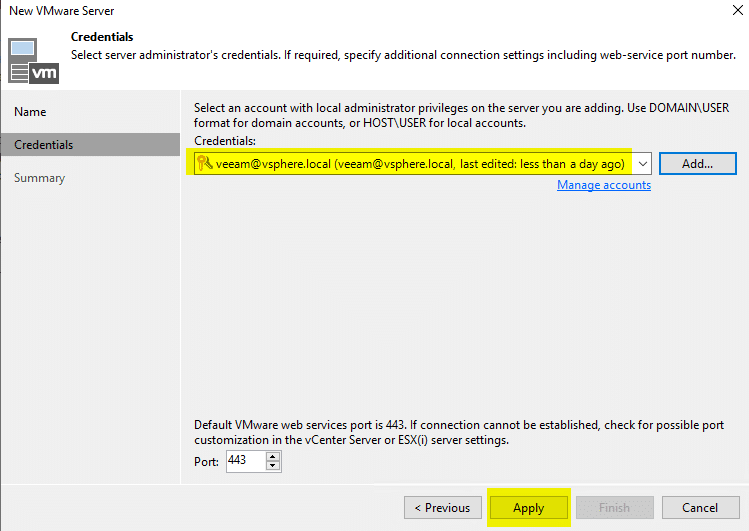
Veeam Backup has a credential database. We will add credentials for our vCenter.
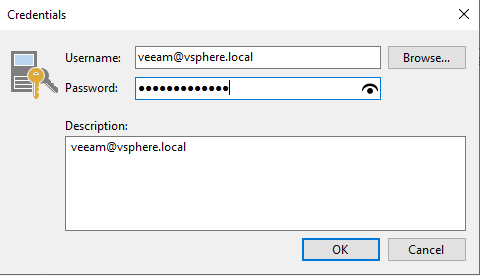
It’s a good practice not to use administrator@vsphere.local for a service account. Therefore I’ve created a user veeam@vsphere.local. Although it’s convenient to give that user the administrator role in vSphere, you shouldn’t do that in production. You should always work with least privileges. You can find the minimum permissions required in the Veeam Help Center.
Now we can see our connection account in the credential collection.
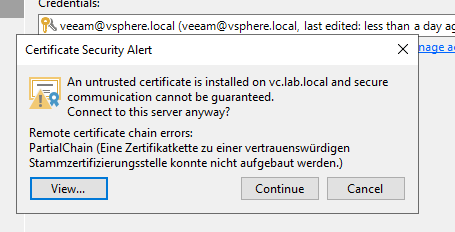
Say hello to self signed certificates in a lab environment. No, we do not care. 🙂
Once vCenter has been adopted, we can see our entire vSAN cluster within die Veeam Backup Client.

Read on page 2 how to build and configure a Linux proxy VM.
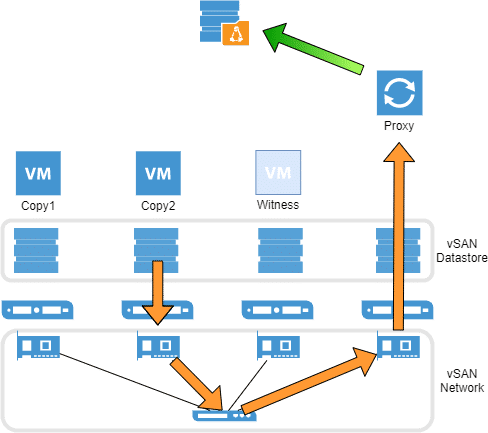
If your Linux Repository is on a external PC or even on one of the ESXi hosts, then the Backup Proxy still has to send data over the network? Your picture (on the left) has the proxy magically sending data (green arrows) through thin air to the repository..?
Hi Michael
Thanks for asking and sorry for not labeling the green arrows. 😉
First of all: in a production environment the repostitory MUST be on a remote host OUTSIDE the protected cluster. Please see warning on top of page 3.
Talking about Proxy LAN traffic:
Of course proxies need do send their backup traffic over a separated VM network segment.
The point is that we keep our backup traffic away from the vSAN backend. See Veeam KB 2273.
If you design your vSAN infrastructure properly, then VM portgroups will use a different uplink port than vSAN.
Yet still there is a chance that we see increased vSAN traffic during backup for some VMs. This can be a result of vSAN cluster properties with a distinct disk object. Veeam cannot predict that.
Nevertheless a distributed proxy design will minimize the overall load on vSAN backbone during backups.