
Proxies
By default the Veeam server will get the proxy role too. But that’s not the smartest idea. Neither on classic bare metal SAN environments, nor on vSAN clusters.
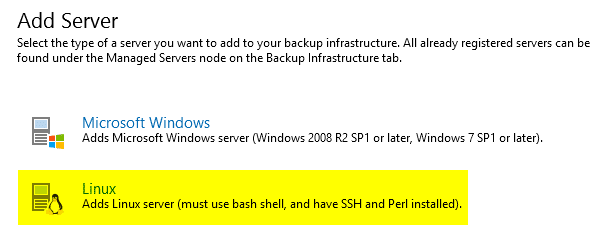
Since Veeam Backup and Replication v10 it is possible to deploy the proxy role on Linux VMs. See the proxy resources in the Sizing Summary.
- 1 CPU core per task (a task is a virtual hard drive)
- 2GB RAM per task
- Minimum of 500MB of HDD working space per task
Well, that’s not very much. But as my cluster consists of 4 vSAN nodes, I’ll have to deploy 4 Linux proxies. I chose an Ubuntu server 20.04 LTS. We won’t need any graphical desktop packages and stuff. Just a plain server VM. There’s no need to select any of the proposed packages during setup. Keep it simple and small.
Prepare Template
After basic setup of Ubuntu server we need to add two more packages. Open-VM-Tools and Perl.
sudo apt-get install open-vm-tools
sudo apt-get install perl
Usually perl is already installed on Ubuntu server. Apt will tell you. The command is just to make sure perl is installed.
Set static IP
Modern Ubuntu versions will manage their network settings in netplan. There’s a good netplan introduction on Ubuntu blog. After you’ve installed open-vm-tools you’ll find two configuration YAML files. One beginning with 00- is the default configuration of Ubuntu and a second one, beginning with 99- is from VMware tools. That’s the one we need to edit.
cd /etc/netplan
Whatever editor you’re going to use – run it with sudo.
sudo nano 99-netcfg-vmware.yaml
DHCP4 will be enabled by default. We’ll have to change yes to no. Add a line “addresses:” and “gateway4:”. In this example my static IP for the first proxy will be 10.0.10.131 with netmask 255.255.255.0 (/24) and 10.0.10.1 as gateway. My search domain is lab.local and DNS is 10.0.10.2.
# Generated by VMWare customization engine.
network:
   version: 2
   renderer: networkd
   ethernets:
      ens160:
      dhcp4: no
      dhcp4-overrides:
         use-dns: false
      dhcp6: yes
      dhcp6-overrides:
         use-dns: false
      addresses: [10.0.10.131/24]
      gateway4: 10.0.10.1
      nameservers:
         search:
            - lab.local
         addresses:
            - 10.0.10.2
Save your changed YAML file and exit the editor. Activate the configuration with the command below.
sudo netplan apply
Don’t worry about errors. I had two typos in my configuration. Netplan will tell you.
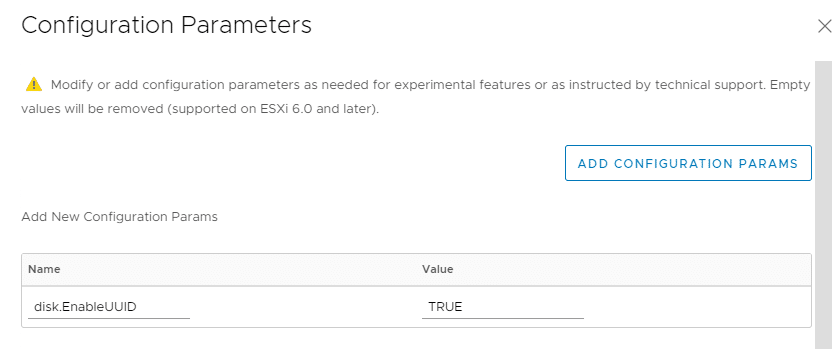
Set advanced VM parameter disk.EnableUUID
Our proxy template is almost finished. But to work in Hotadd Mode the Linux VM needs an advanced feature to “see” the UUID of the vSAN datastore. To set this advanced parameter the powerstate of the VM needs to be OFF. Edit VM configuration and click on “add configuration params”. Enter name disk.EnableUUID and set the value to TRUE.
I’ve converted my proxy VM into a template and created a guest costomization policy for Linux. Settings are simple: Use VM name as hostname, ask for IP address, start VM after deployment. That’s it.
Deploy proxy from template
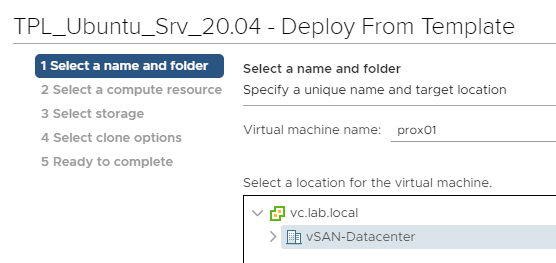
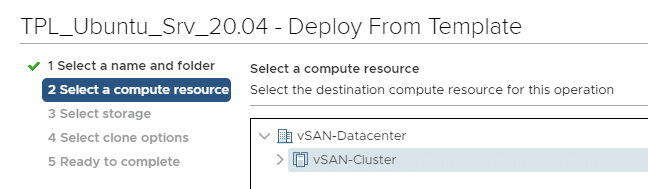
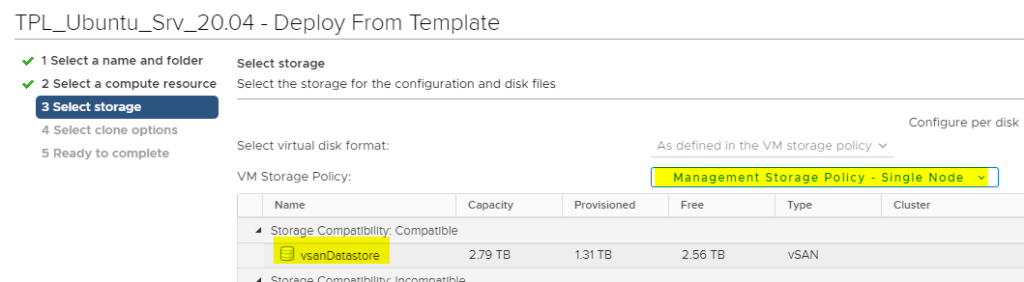
Deployment is quite simple and fast. So I’ve decided to use a single node storage policy (=RAID 0, no redundancy). That’s just to save some precious AF datastore. 😉
Here we can select the guest customization policy that I’ve created before.

We now have a ready and running Linux VM. Check DNS name resolution and connectivity (PING) from the veeam server. If it works, we can add our first proxy.
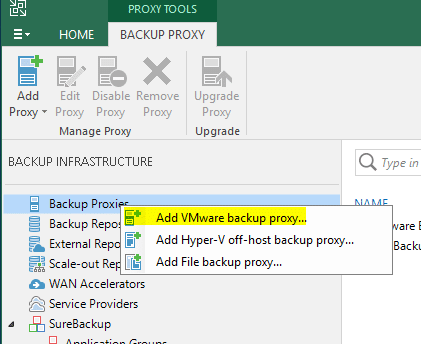
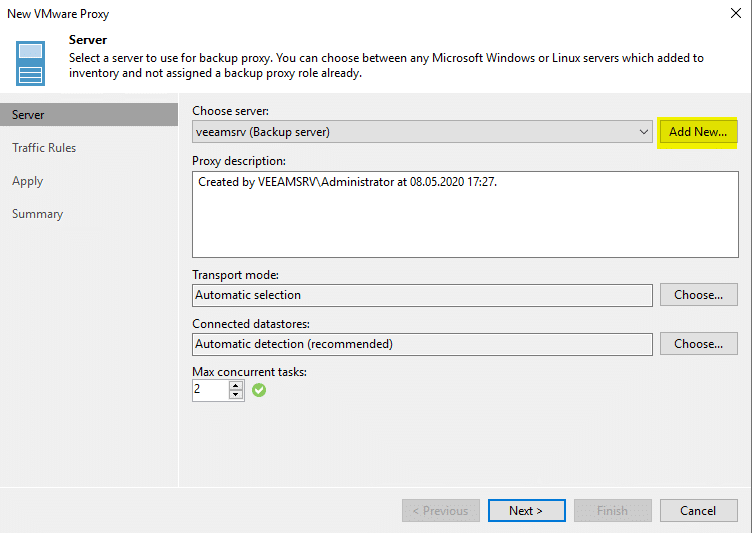
We don’t want to select the Veeam Backup server (default), so we click on “Add New”.
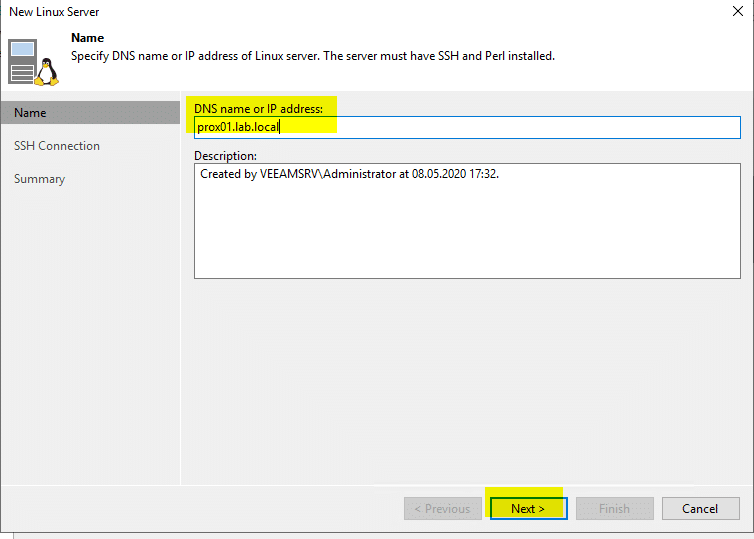
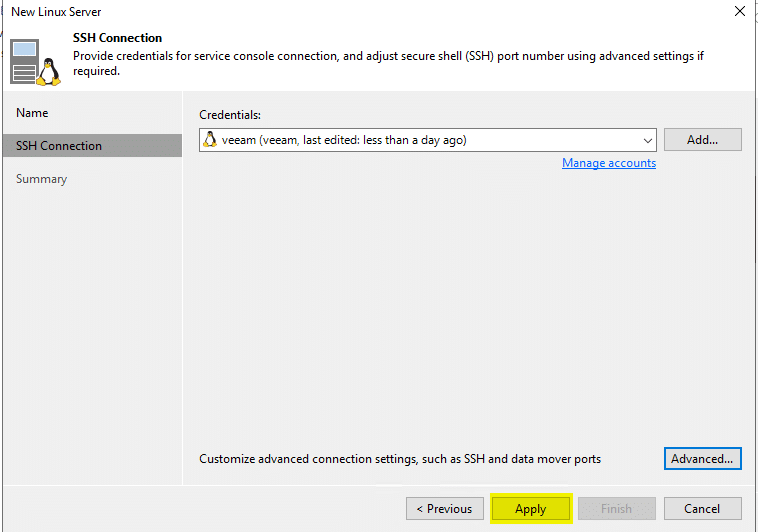
Enter FQDN of the proxy.
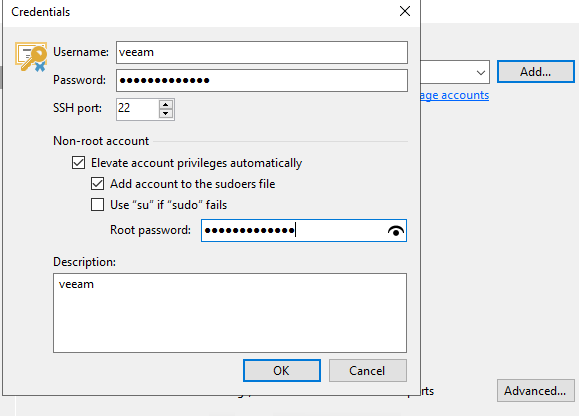
Before Veeam can access the Linux VM, we have to provide credentials.

My admin user is “veeam”. As modern Linux system do not work with user ‘root’ it is important to elevate privileges for user veeam automatically and add him to the sudoers group. You have to provide the root password as well (that’s the password you have to enter after a sudo command).
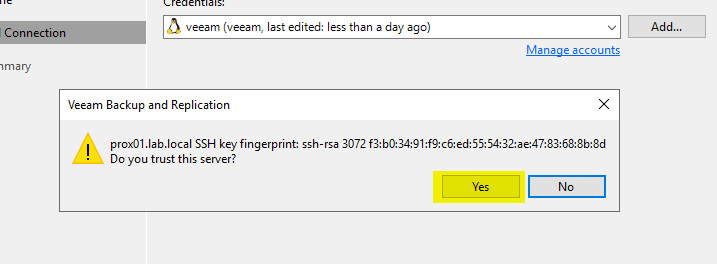
Veeam opens a connection via SSH. The fingerprint is to make sure you’re talking to the right VM.
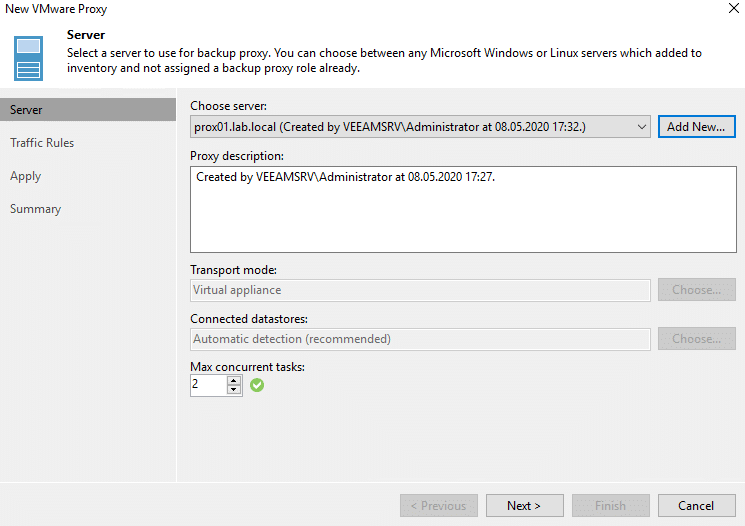
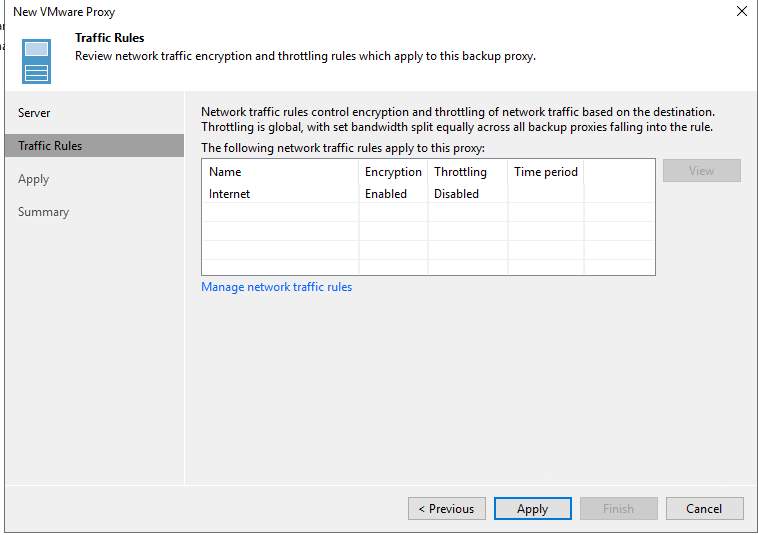
We won’t apply any traffic roles in a POC.
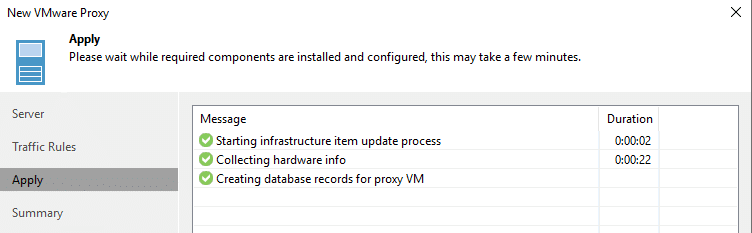
Veeam will trigger some perl scripts on the new proxy. That’s why we had to install perl runtime in the first place.
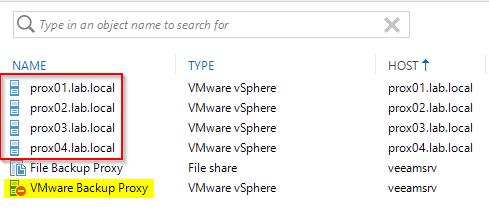
Congratulations, you have added your first Linux based Veeam Proxy. Repeat until all hosts in your vSAN cluster have a corresponding proxy.
As you can see in the picture below, I have four proxies. One for each ESXi host in the vSAN cluster. You should also disable the default proxy role on the Windows Veeam server.
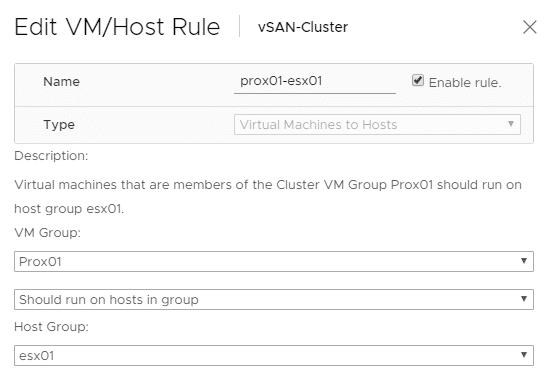
Configure DRS
We want one proxy per ESXi host. They’re working locally. So we have to make sure that each proxy will stay in its host. We can achieve that by defining soft DRS rules to keep proxies on their corresponding hosts. I’ve created four host groups esx01 to esx04 with one host each, and four VM groups prox01 to prox04. We then need four VM-to-host rules like the one below.
Read on page 3 how to build and configure a Linux repsitory VM with fast clone ability.
If your Linux Repository is on a external PC or even on one of the ESXi hosts, then the Backup Proxy still has to send data over the network? Your picture (on the left) has the proxy magically sending data (green arrows) through thin air to the repository..?
Hi Michael
Thanks for asking and sorry for not labeling the green arrows. 😉
First of all: in a production environment the repostitory MUST be on a remote host OUTSIDE the protected cluster. Please see warning on top of page 3.
Talking about Proxy LAN traffic:
Of course proxies need do send their backup traffic over a separated VM network segment.
The point is that we keep our backup traffic away from the vSAN backend. See Veeam KB 2273.
If you design your vSAN infrastructure properly, then VM portgroups will use a different uplink port than vSAN.
Yet still there is a chance that we see increased vSAN traffic during backup for some VMs. This can be a result of vSAN cluster properties with a distinct disk object. Veeam cannot predict that.
Nevertheless a distributed proxy design will minimize the overall load on vSAN backbone during backups.