
This will be a multi-part post focused on the VMware Bitfusion product. I will give an introduction to the technology, how to set up a Bitfusion server and how to use its services from Kubernetes pods.
- Part 1 : A primer to Bitfusion
- Part 2 : Bitfusion server setup (this article)
- Part 3 : Using Bitfusion from Kubernetes pods
Bitfusion Server setup preparation
A Bitfusion Server Cluster must meet the following requirements:
- vSphere 7 or later
- 10 GBit LAN at least for the Bitfusion data traffic for smaller or PoC deployments. High bandwidth and low latency are essential. 40 Gbit or even 100 Gbit are recommended.
- Nvidia GPU with CUDA functionality and DirectPath I/O support:
- Pascal P40
- Tesla V100
- T4 Tensor
- A100 Tensor
- At least 3 Bitfusion server per cluster for high availability
This setup guide assumes that the graphics cards have been deployed to the ESXi 7+ servers and the hosts have joined a cluster in vCenter.
Identifying the vCenter TLS Certificate Signature
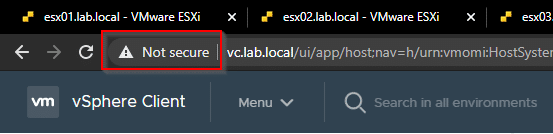
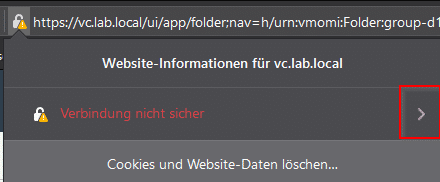
During the setup process, the certificate signature (thumbprint) of the vCenter server is required. To get it, we log in to the vCenter with the vSphere Client. On the left side of the URL in the browser we click on the secure icon. The following section describes the procedure for Chrome and Firefox.
Chrome
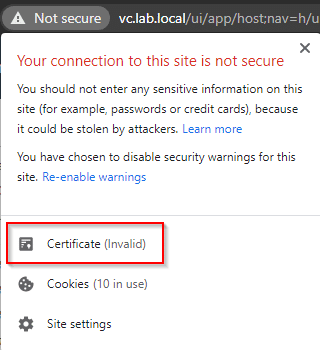
Click on the secure (or not secure) icon next to the URL
Click on Certificate.
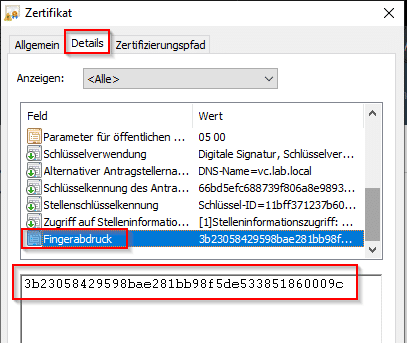
Select the “Details” tab and go to the “Thumbprint” area. Copy the thumbprint from the window.
Firefox
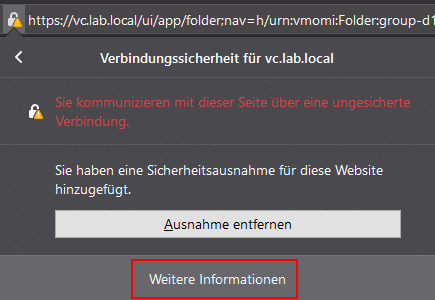
Click on the security symbol next to the URL.
Click on arrow next to the securiy information (red box).
Click on more information in the lower part of the window (red box).
Click on Tab “Security” and select “Show Certificate”.
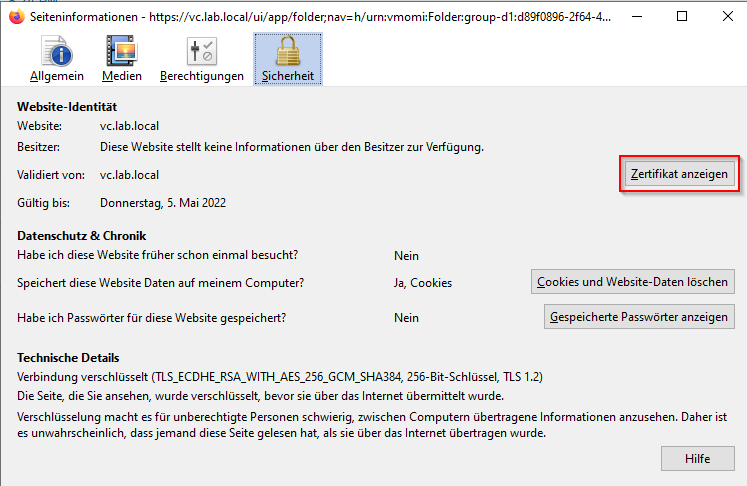
Firefox opens a new tab with details about the certificate. Scroll down to the section “thumbprints” and copy the SHA-1 thumbprint.

Determine the vCenter GUID
When deploying the Bitfusion Server appliance, the GUID of the vCenter is required. This can be easily obtained from the URL of the vSphere client. To do so, we log into the vSphere client, select any object, and then copy the URL from the address bar. The GUID we are looking for can be found after the object ID. In the example below this is an ESXi host with the ID host-76017.
https://vc.lab.local/ui/app/host;nav=h/urn:vmomi:HostSystem:host-76017:d89f0896-2f64-4ebb-8232-de45a28b6392/summary
So the GUID of the vCenter we are looking for is:
d89f0896-2f64-4ebb-8232-de45a28b6392
Make a note of the GUID for the installation of the first Bitfusion server.
Prepare GPU for passthrough
To use a graphics card in a vSphere Bitfusion server, the device must be enabled for passthrough mode. This operation enables direct access to the GPU by the Bitfusion server, bypassing the ESXi hypervisor, achieving performance equivalent to that of the GPU on a native system.
When using Passthrough mode, each GPU is dedicated to a Virtual Machine (VM) of the vSphere Bitfusion server. Multiple physical GPUs can be used in passthrough mode. All GPUs on an ESXi host can either be assigned to one Bitfusion server appliance, or distributed across multiple. The following procedure must be performed for all GPU devices to be assigned to a Bitfusion server.
In vSphere Client, we select an ESXi host that has graphics cards. Configure > Hardware > PCI Devices > Configure Passthrough.

In the dialog, one or more GPUs are selected for passthrough. Optionally, a hardware tag can be defined.

In the “Edit PCI Device Availability” dialog, set the checkbox next to the selected graphics cards in the ID column. After that, the GPU appears in the list of “Passthrough enabled devices”. The ESXi host must be rebooted afterwards.

Deployment of the first Bitfusion server appliance
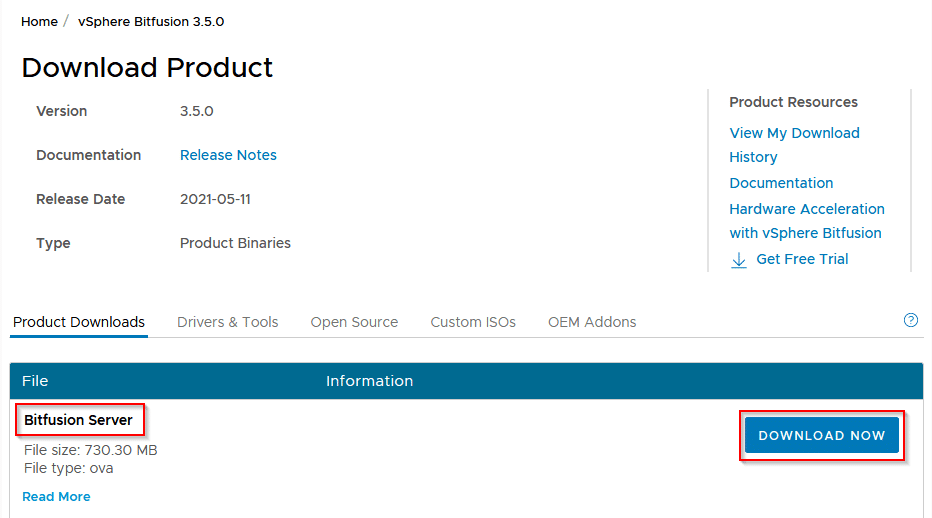
The Bitfusion Server Appliance is deployed as an OVF template and can be obtained from VMware Downloads (login required). The deployment process differs for the first and subsequent Bitfusion Server Appliances.
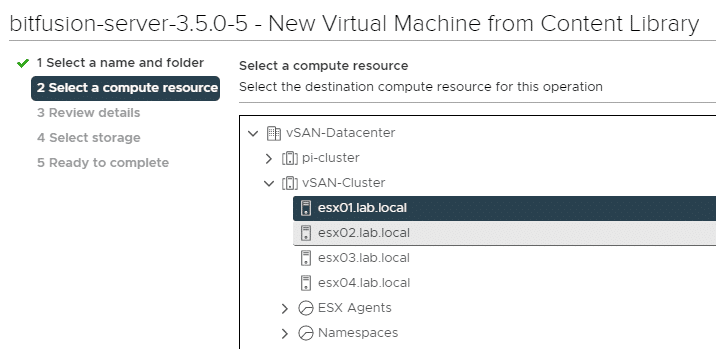
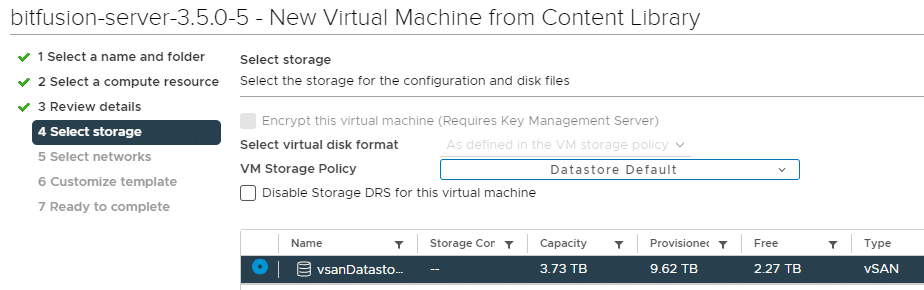
Deploy the OVA image to the cluster.

A host with GPU previously enabled for passthrough is selected as target. The Bitfusion Server VM will remain on this host from now on and cannot be moved with vMotion.
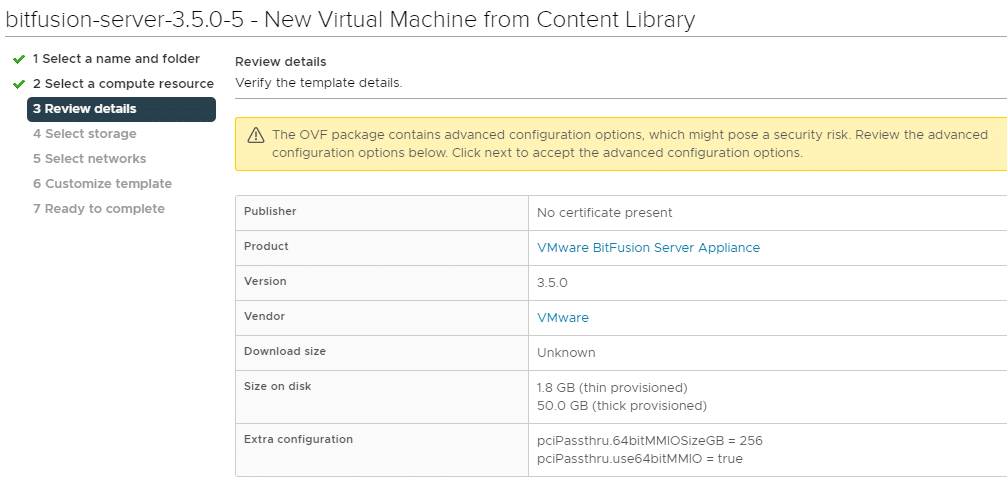
The first steps are self-explanatory and generally corresponding to the deployment of a virtual appliance.
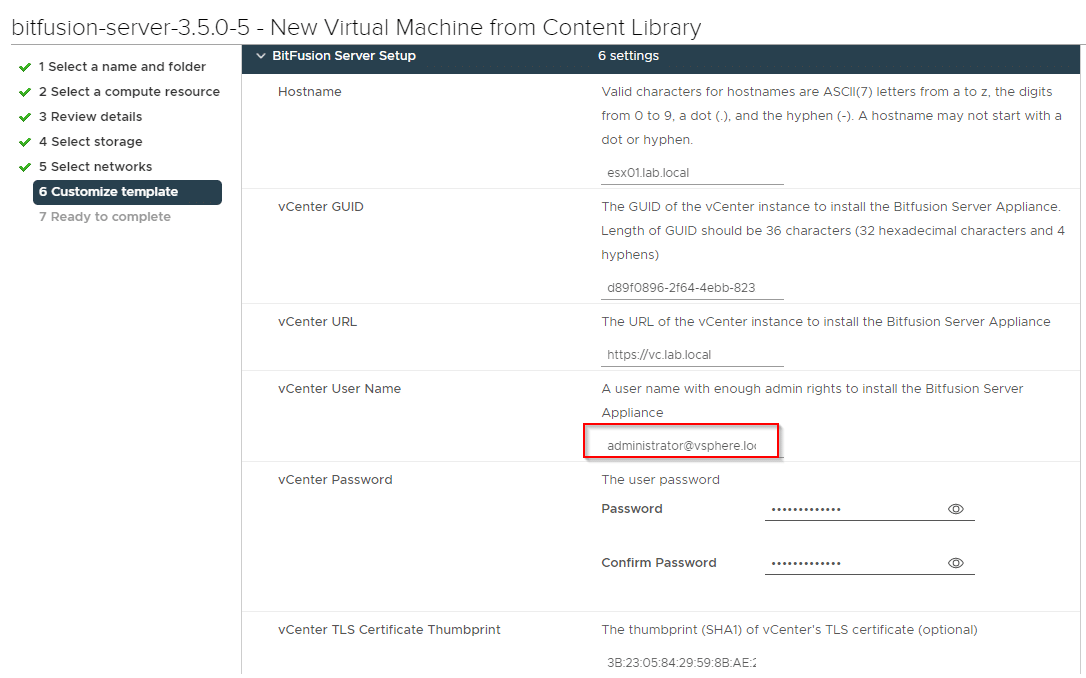
Attention! Even if the username with administrator@vsphere.local seems to be already preset (light grey), it must be entered again.
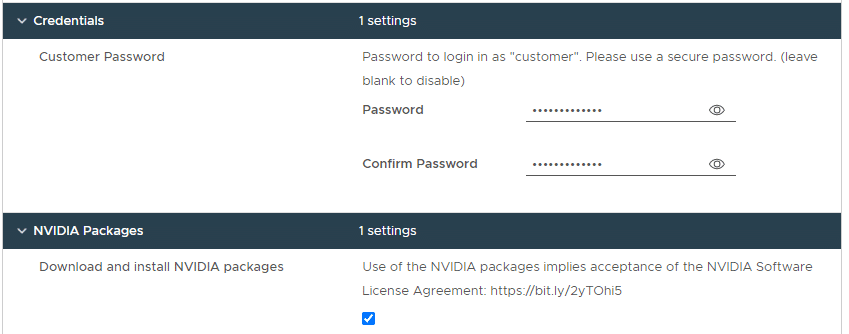
For the automatic download of the Nvidia drivers, it is necessary that the vCenter can establish a connection to the Internet. For installations in dark data centers, this checkmark must not be set and the packages must be transferred manually at a later time.
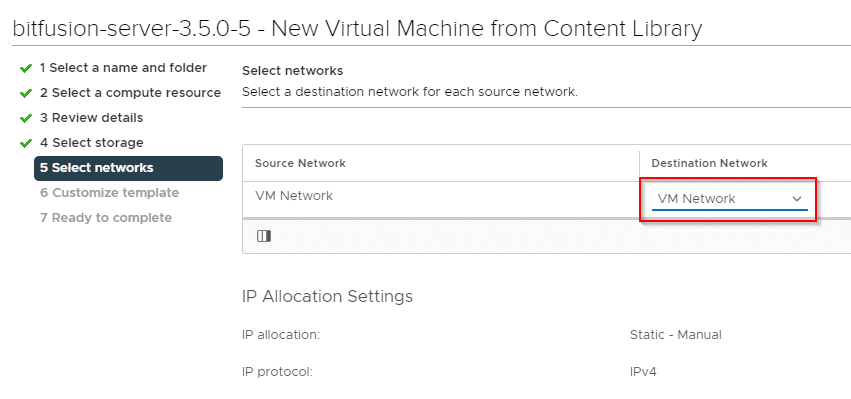
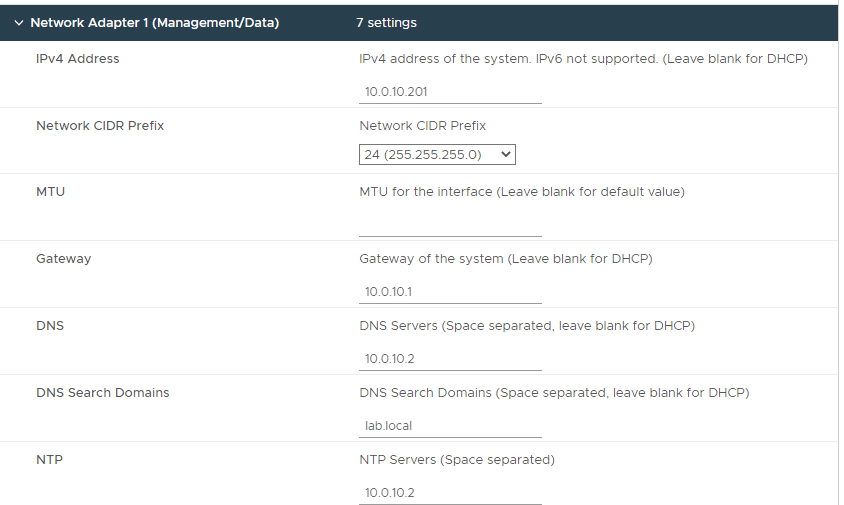
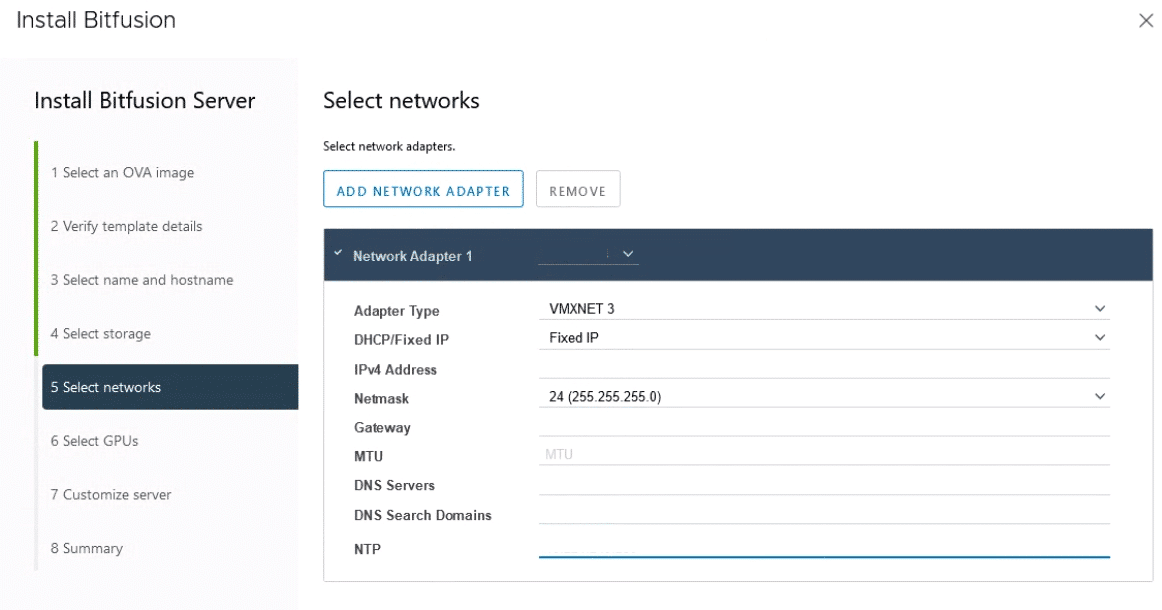
In the next step, the network setting of the management network is being configured. The configuration of adapter 1 (management) is mandatory. All other adapters (2, 3 and 4) are for Bitfusion data communication and can be configured later. The Bitfusion server itself selects the most suitable network for data traffic. Management and data networks should definitely be separated in productive environments.
There is a discrepancy in the naming of the networks here: While the official documentation refers to Management and Data, the product developers refer to them as Web Network and Management/Data. This repeatedly led to misunderstandings during telephone conferences and e-mails with the developers.
I will therefore describe the adapters functionally: The 1st adapter is responsible for communication with vCenter and the 2nd and all subsequent adapters are used for Bitfusion client to Bitfusion server communication.
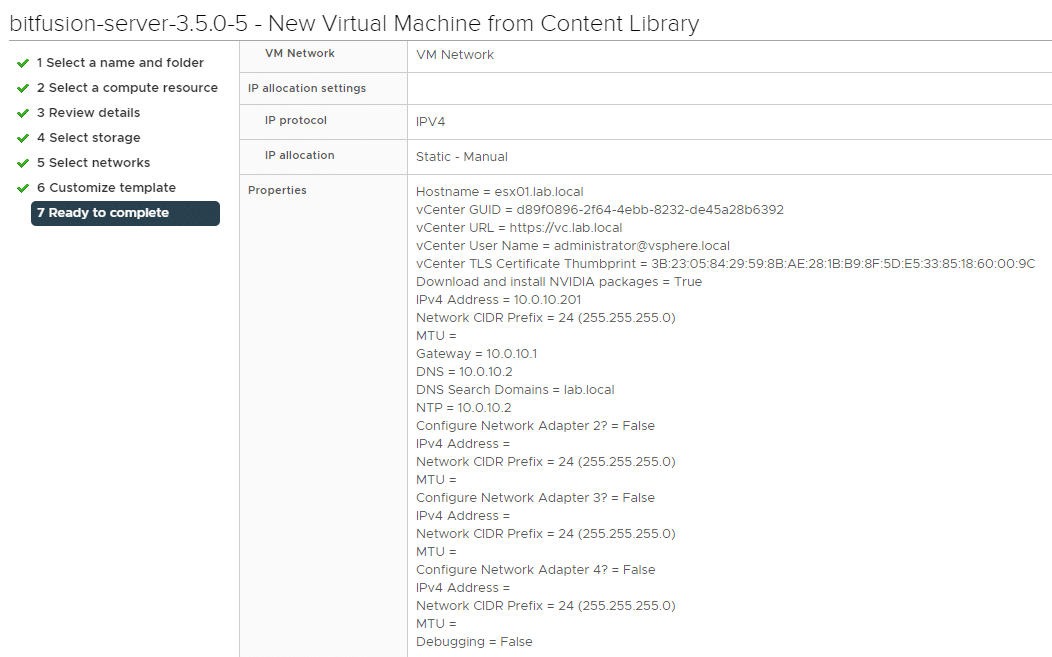
Finishing the procedure and overview of the selected settings.
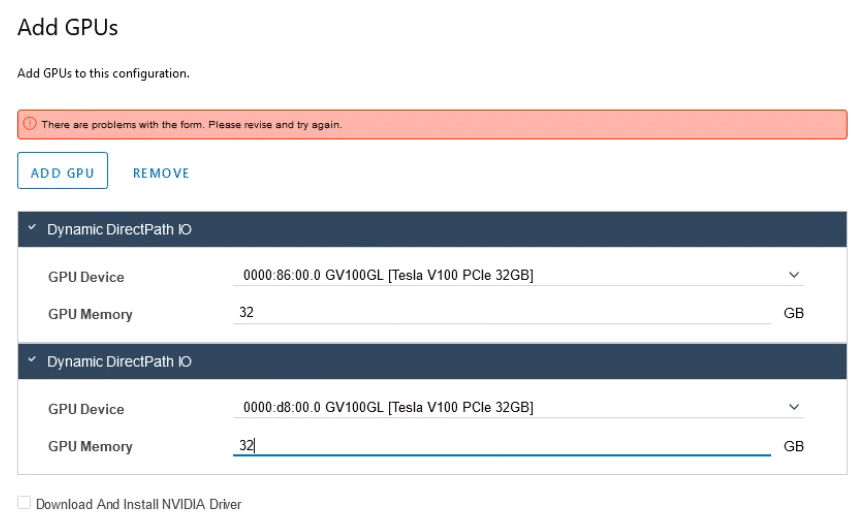
Configure appliance and add GPU devices.
In order for the appliance to compute work packets from the LAN on a GPU in the future, we need to provide it with graphics cards from the host that we had previously configured for passthrough. The Bitfusion Server VM must be switched off for this to work.
In the Bitfuson VM settings we select Virtual Hardware > Add new Device > Other Devices > PCI Device.
In the dropdown we can select the GPU. If more than one GPU is added, the individual PCI addresses of the cards must be selected.
CPU and memory resources
On dedicated Bitfusion hosts, the CPU and memory of the Bitfusion VM should be set to the available maximum.
If other workloads or multiple Bitfusion servers are run on the host in additional to the Bitfusion server, the minimum resources of the VM are calculated using the following rule of thumb:
vCPU = number physiscal GPU x 4
RAM = Sum of GPU RAM of all GPU devices x 1.5 // but at least 32 GB
For example, if we have two GPUs with 16 GB of RAM each, the Bitfusion appliance would need to be assigned at least 48 GB of RAM 1.5 x (16 + 16).
The configured VM guest memory has to be reserved complety.
Memory Mapped i/O Size (MIMO)
IAn advanced property has to be configured in the VM.
MIMO Size = Sum of GPU RAM -> rounded up to the next power of 2.
Example: 2 cards with 32 GB RAM each: 2x32GB = 64 GB -> next power of 2 is 128 GB.
The advanced parameters will be set in the VM using:
VM > Edit Settings > VM Options > Advanced > Configuration Parameters > Edit Configuration.
pciPassthru.use64bitMMIO = true
pciPassthru.64bitMMIOSizeGB = 128
After saving the settings, the Bitfusion server appliance will be started.
Once the first Bitfusion appliance is deployed, configured, and booted, the Bitfusion plugin integrates with the vSphere Client. To do this, it may be necessary to re-login to the vSphere Client.
Deployment of additional Bitfusion servers
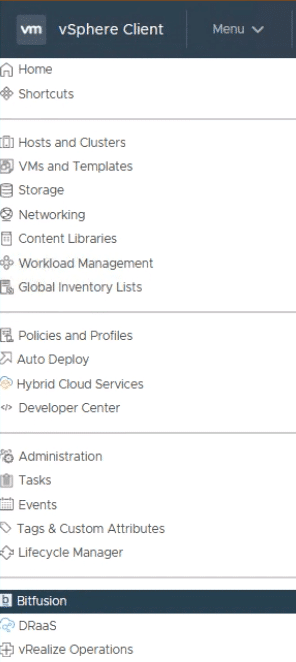
The first Bitfusion server provides the vCenter plugin, which then becomes visible from the Menu .
Additional Bitfusion Server appliances must be deployed via the vSphere Client plugin. Only then will they form a cluster with the first appliance. To do this, select an ESXi host with unused GPU cards in the Hosts & Clusters view and choose Bitfusion > Add Bitfusion Server from the context menu.
Available GPUs in the host are being displayed and can be assigned to the new Bitfusion server. If there is no online connection to download the Nvidia drivers, they have to be transferred manually.
Each subsequent GPU card is added with “Add GPU”. It may be necessary zo adjust the GPU memory values of the card.
Bitfusion UI
After installing the first Bitfusion server, the Bitfusion plugin integrates into the vSphere client. The Bitfusion settings can be accessed under Menu > Bitfusion. The menu is divided into Cluster, Servers, Clients, Tokens, Settings and About.

Cluster UI
Overview of the Bitfusion cluster with Bitfusion servers and Bitfusion clients, as well as the GPU allocation over time.
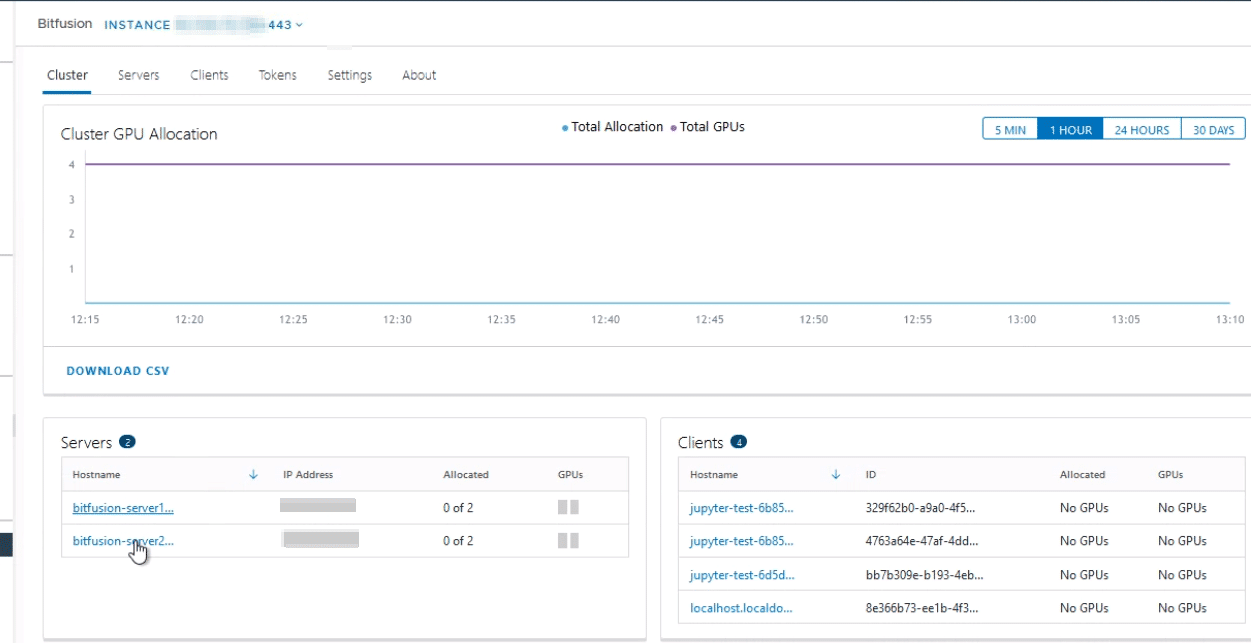
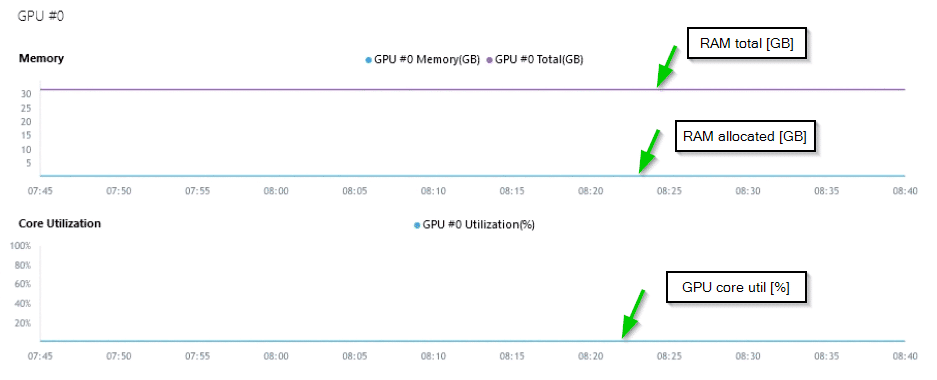
Servers UI
List of all Bitfusion servers in the cluster with IP address, number of currently allocated GPU, system health and metrics of all GPU (RAM allocation and core utilization). The usage can be displayed in a time range of 5 minutes, one hour, 24 hours and 30 days.
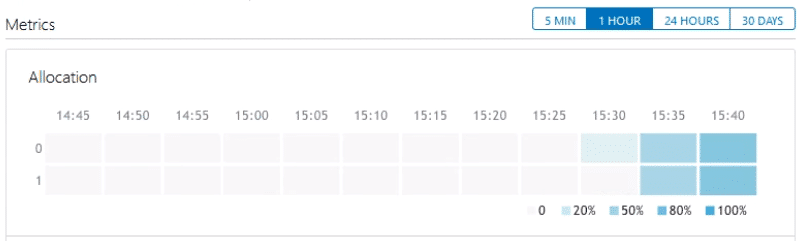
In the image above, we see the allocation of a Bitfusion server with two physical GPU (0 and 1). The shading indicates the allocation percentage of the GPU. The gauge refers to the GPU RAM, not the GPU cores.
The more precise utilization of the GPU resource is shown by a further graph.
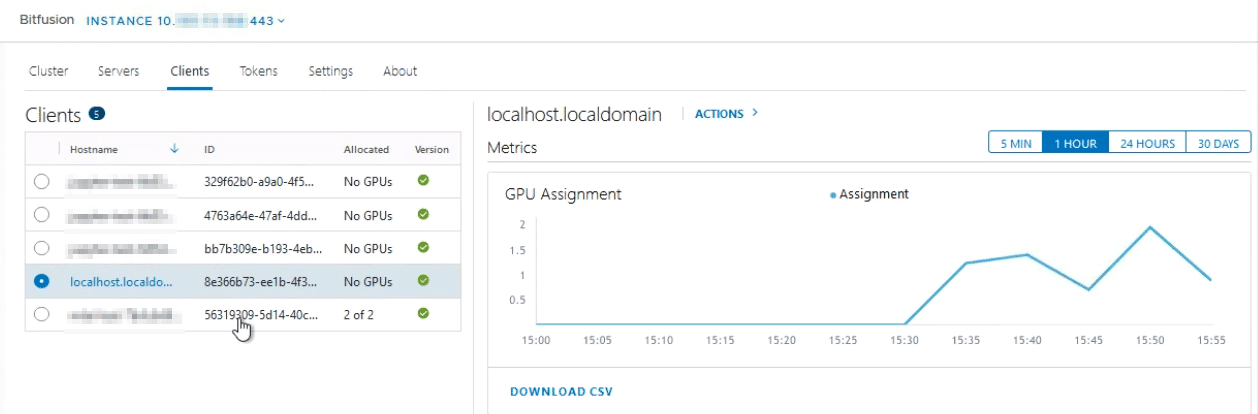
Clients UI
All Bitfusion clients that request or have recently requested GPU resources. No matter if they are container pods or VMs.
Tokens UI
Registered security tokens, which are required for gaining access to Bitfusion servers. Tokens can be activated or deactivated via a toggle element (green).
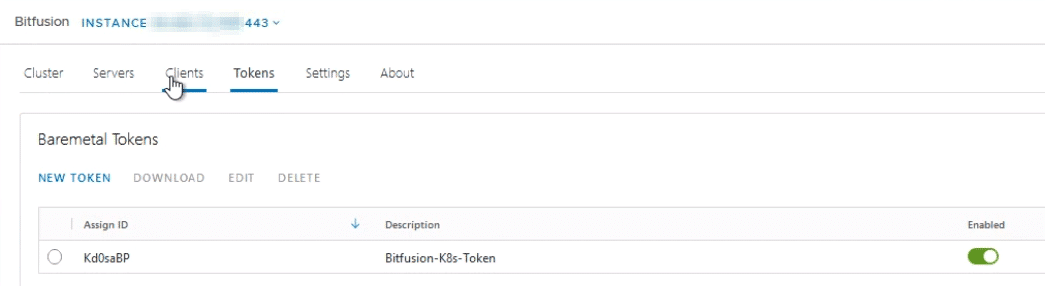
The token can be generated, downloaded, edited (description) or deleted.
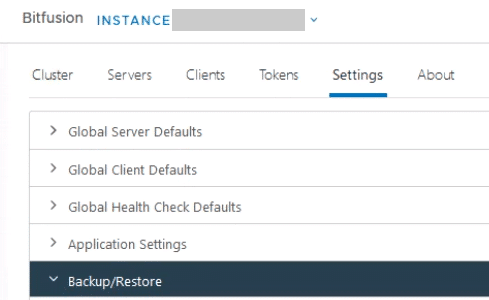
Settings UI
In the Settings tab we find the current server and client settings. Additionally, there are health check parameters, as well as the backup and restore function. The latter is important when upgrading Bitfusion, since Bitfusion does not yet allow rolling updates and the cluster must be completely redeployed.
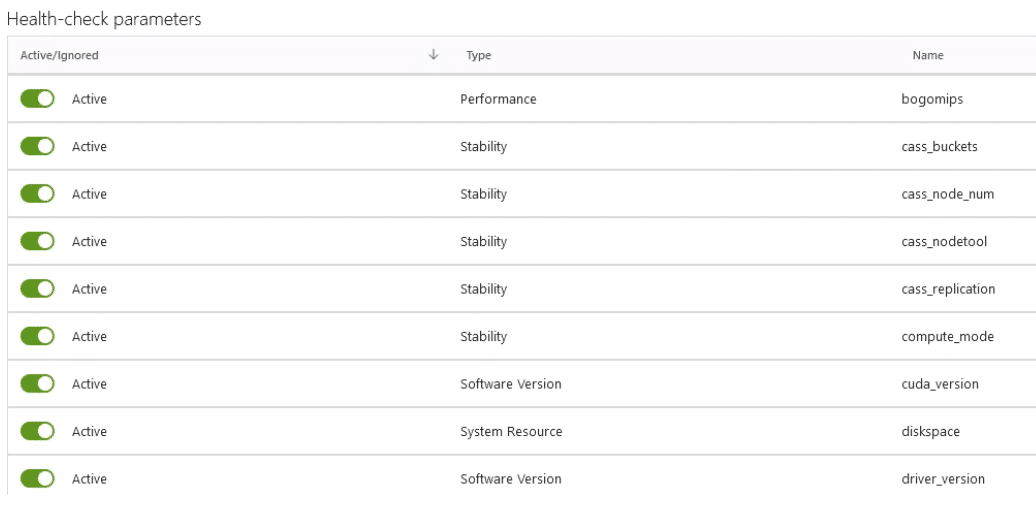
Global Health Check Defaults
In the Healthcheck defaults section, you can configure which parameters are to be taken into account in the healthcheck and which are not.
Backup/Restore
The backup and restore function is not only important for emergencies, but currently also for the update process of the Bitfusion Server VMs. The process is disruptive, i.e. all server appliances have to be terminated and rolled out again. Restoring a previously saved backup allows the settings to be restored. Backups can be downloaded from within the GUI.

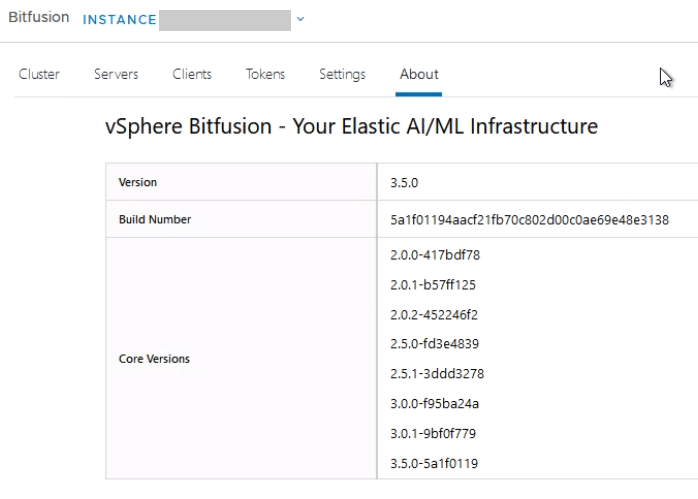
About UI
Provides information about the current Bitfusion version and build.
Furter reading
- Part 1 : A primer to Bitfusion
- Part 2 : Bitfusion server setup (this article)
- Part 3 : Using Bitfusion from Kubernetes pods