On older Windows systems, it may not be possible to contact the Powershell Gallery. An error is returned when an attempt is made.
Unable to resolve package source ‘https://www.powershellgallery.com/api/v2’
Root cause in the TLS
Transport Layer Security (TLS) is an encryption protocol for secure data transmission on the internet. Since 2021, TLS versions 1.0 and 1.1 have been considered obsolete and are therefore no longer accepted by many applications. TLS 1.2 and 1.3 have therefore become the new standard. The Powershell Gallery has also required at least TLS 1.2 since 2020 and rejects older protocols. Older Powershell versions such as Powershell 5.1 do not support this configuration.
Query current security protocol
[Net.ServicePointManager]::SecurityProtocol
Powershell usually returns the value ‘SystemDefault’ as the result. This means that Powershell uses the system-wide settings for TLS.
PS > [Net.ServicePointManager]::SecurityProtocol
SystemDefault
If an older TLS version is defined as the default in the system, Powershell uses this as the default.
Enforce TLS 1.2
TLS 1.2 can be enforced in Powershell with the command shown below. However, this command must be executed again in every new Powershell session.
[Net.ServicePointManager]::SecurityProtocol = [Net.SecurityProtocolType]::Tls12
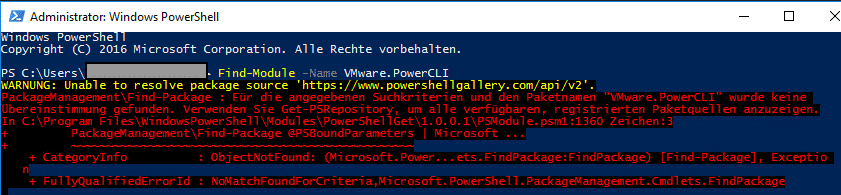
The command from the first screenshot can be executed again for testing purposes.
PS > Find-Module -Name VMware.PowerCLI
The version of the module is now returned without an error message.
Version Name Repository Description
------- ---- ---------- -----------
13.3.0.... VMware.PowerCLI PSGallery This Windows PowerShell module contains VMware.PowerCLI
Sustainable solution
Forcing the TLS 1.2 version can only be a short-term fix. In the long term, the Poweshell version in the OS should be brought up to date. Older systems that have reached their end-of-life (EoL) according to Microsoft should no longer be used. That’s easy to say, but in practice I often come across legacy systems that cannot be replaced for a variety of reasons.