On October 20th 2020 VMware released NSX-T version 3.1 (release notes).
Upgrade from version 3.0
I’ll outline the process of upgrading from version 3.0.x to version 3.1. In the example shown, a base version 3.0.2 is upgraded, but the process is the same for all versions from 3.0.
Requirements
We’ll need an upgrade bundle (MUB) from VMware download site (login required).
Upgrade
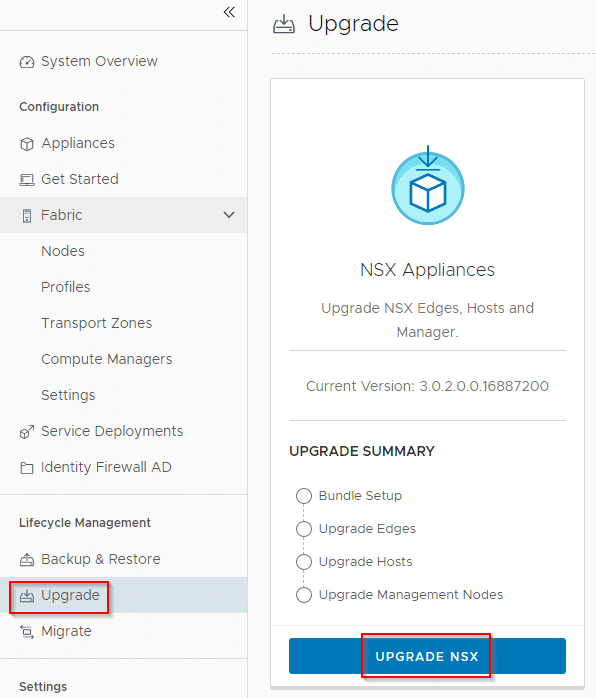
First we need to login to NSX-T Manager. Go to section Lifecycle Management and select Upgrade. You’ll see your current version on the right. Start the process with Upgrade NSX.
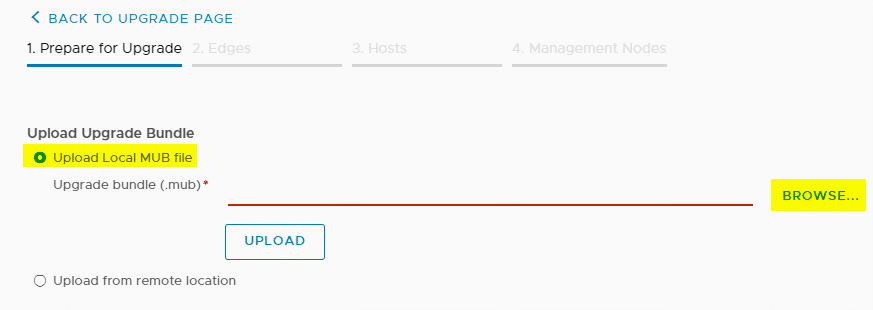
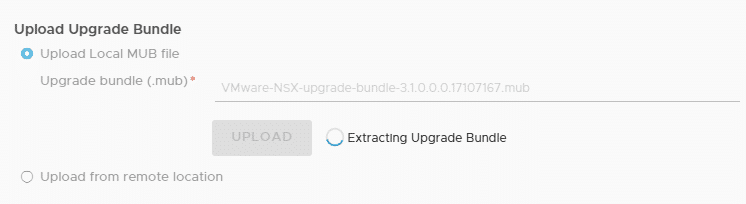
First step is to point to our local MUB file by clicking browse.
Sobald der Pfad definiert ist, kann das Paket mit dem Upload Button zum Manager hochgeladen werden.
As soon as we’ve selected the path to our MUB file, we can click on Upload.
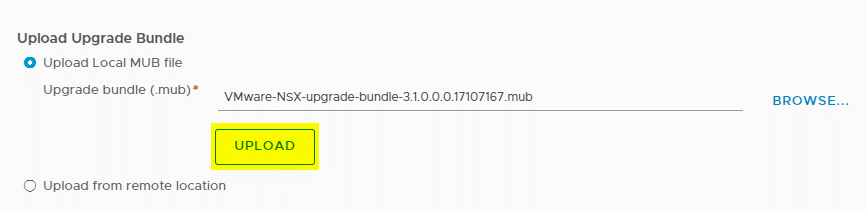
Upload may take a while. A progress bar keeps you informed.

After upload the upgrade bundle will be extracted automatically.
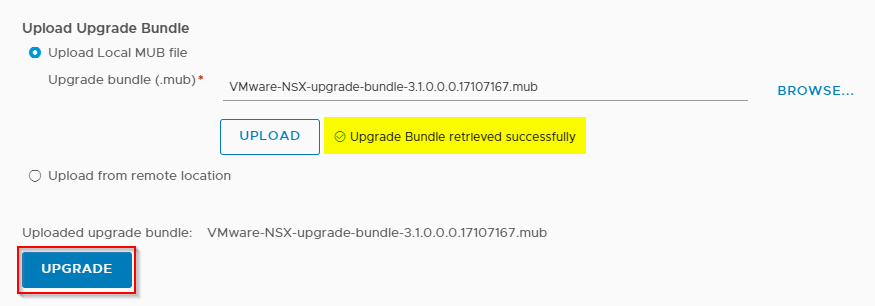
After successful upload and validation of the package, we can start by clicking Upgrade.
But wait! Nothing will start before we’ve accepted the the EULA.

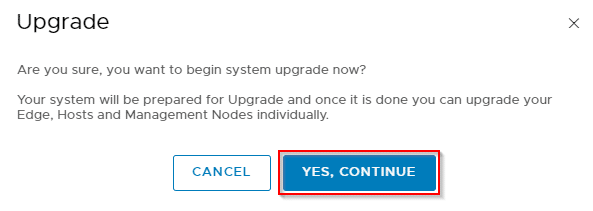
There will another confirmation before we can upgrade our systems. If you’re ready to start, click on Yes, Continue.
Eine Übersicht der Versionen der Edges, Hosts und NSX-Manager, sowie das Ergebnis der Pre-Checks wird angezeigt. Die Prozedur ist in 4 Schritte unterteilt:
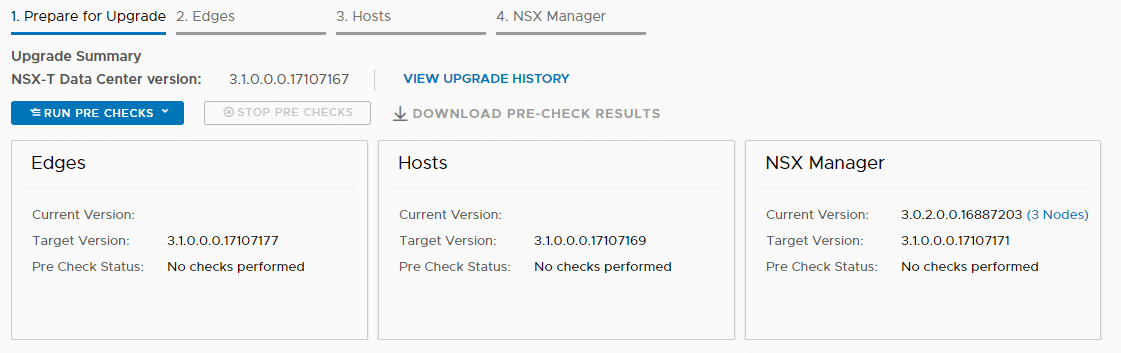
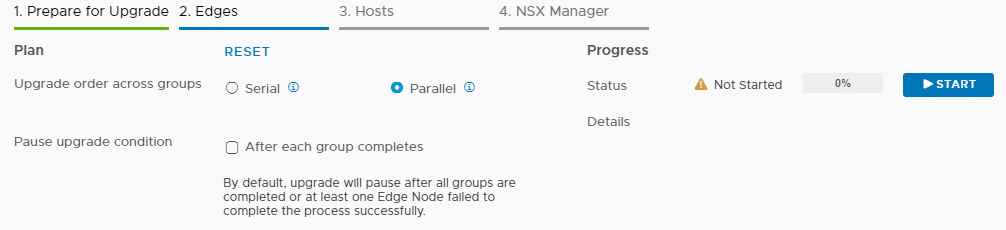
An overview of all Edges, Hosts and NSX Managers will be displayed. As well as the result of the Pre-Checks. The procedure is divided into 4 steps:
- Pre Check. The pre-checks can be performed individually or globally for all objects. The result can be downloaded for documentation (Download pre check results).
- Upgrade Edges
- Upgrade Hosts. You should set DRS to fully automatic mode. Otherwise hosts will not be able to migrate VMs and enter maintanance mode. If DRS is inactive you must make sure that all affected hosts are already in maintenance mode before upgrade.
- Upgrade NSX-Manager
In the scenario shown here there are only NSX-Managers. That’s why there is no current version displayed at Hosts and Edges.
There is a short reminder that we shouldn’t apply any changes or reboots to the hosts during upgrade. By clicking Next we can start the first upgrade step.

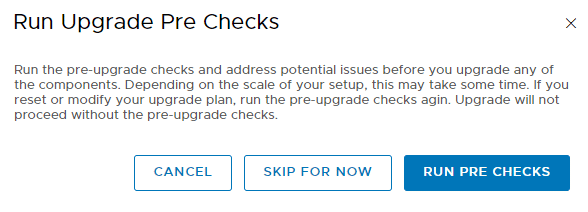
Pre-Checks are mandatory.
After upgrading each group, the process pauses and must be continued by activating Start again. The objects can be upgraded one after another (sequentially), or in parallel.
Before Upgrade you can see a list of units to be upgraded. Click Start to resume.
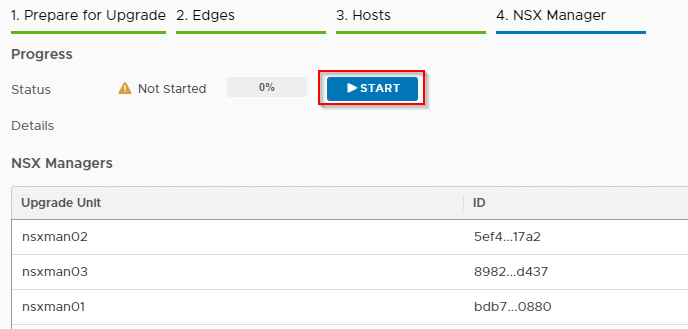
It is important that no concurrent actions are performed by other administrators for the duration of the upgrade.
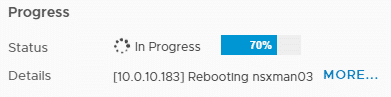
In this example we can see (progress bars) that the upgrade is applied to units in parallel.

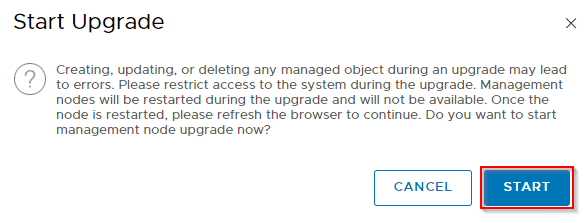
Update and reboot of the appliances is fully automatic. Best advice: keep your fingers off the keyboard and get some coffee. 😉
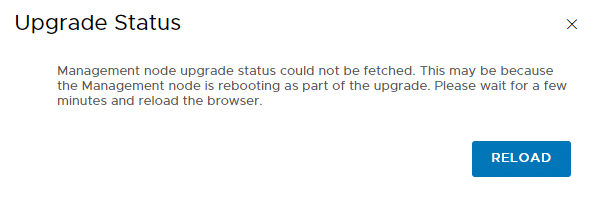
At the end of the NSX-T Manager upgrade, we’ll lose contact with the Web GUI. This is normal and requires some patience. -> get more coffee.
After we have successfully logged in to the NSX-T Manager again, we also immediately see one of the innovations: Dark Theme.
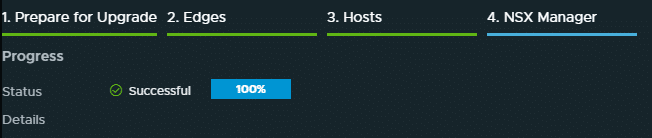
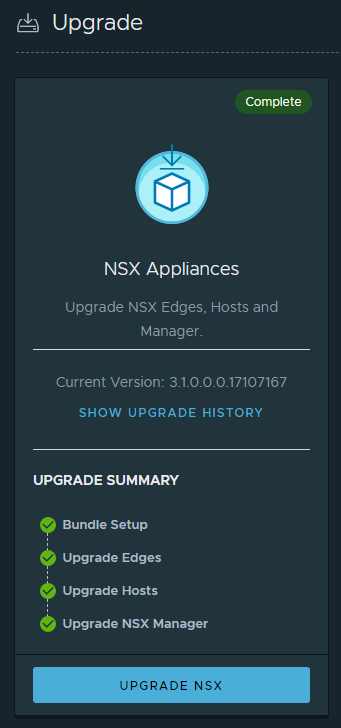
Der Prozess kann abgeschlossen werden und unter Lifecycle Management > Upgrade der aktuelle Status überprüft werden. Man sieht, dass wir erfolgreich auf Version 3.1 aktualisiert haben.
The process can be completed and the current status can be checked in section Lifecycle Management > Upgrade. You can see that we have successfully upgraded to version 3.1.