
Options to recover from storage snapshots
Peculiarities of storage snapshot based restore points
Once you have generated storage snapshots as described, they get scanned automatically or you can trigger a scan from the console. The VMs they carry will be shown in the “Backups” tree of the Veeam console. You can find the VMs with all their recovery points in the “Snapshots” hive besides the regular backups. Each restore point equals a specific snapshot inside DataCore.
Our example shown here was generated using a snapshot-only-job by the name of “Snapshot-Only-Demo” carrying only a single VM “Zeus” to be backed up with application integration.
Once the scan of the storage snapshot has finished successfully, all VMs inside the snapshot of the LUN will be shown. Even if the snapshot was created by a snapshot-only-job with only some of your VMs, you will find all VMs on the snapped LUN(s) as its contents. Thus, the other three VMs in our example could be considered “bycatch”. Though we could recover (from) them as well.
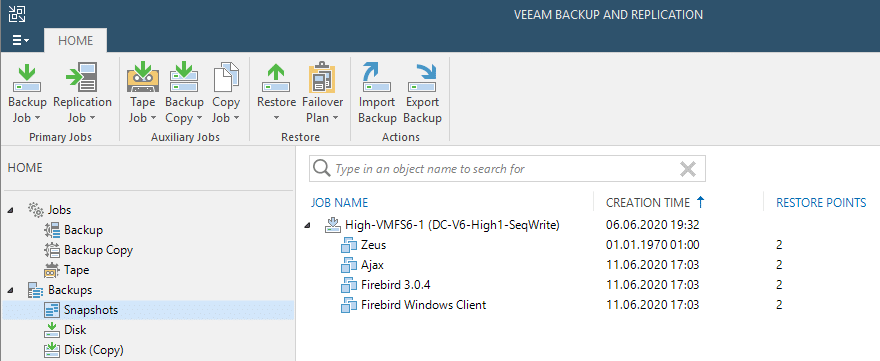
Note that a bug in the current edition of the DataCore plugin shows the application consistent VMs with a wrong creation date. The crash-consistent VMs are presented with the correct date of snapshot creation. This bug will be presumably be solved in the next version of the plugin.
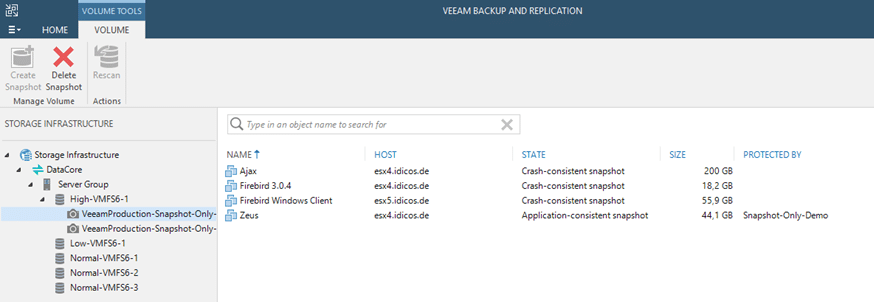
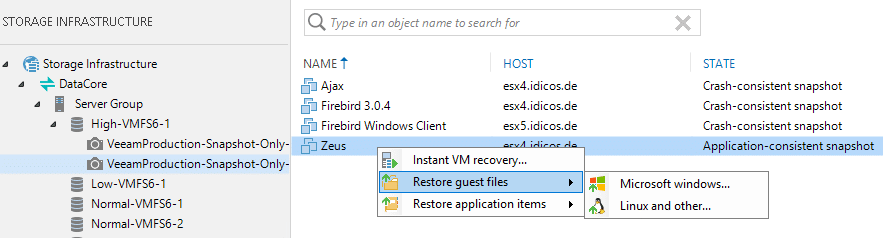
The snapshots underneath will also show up in the “Storage Infrastructure” menu. Also, with the VMs presented inside. The job name is shown in the “protected by” column. If the snapshot-only-job was run with application integration you can differentiate the VMs by their state here. This can be either “Application consistent” or “crash-consistent”.
Options for recoveries from snapshots
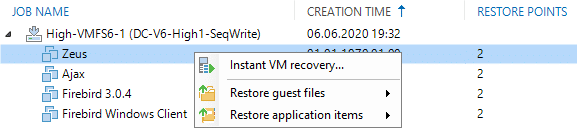
As with regular Veeam backups we are offered different types of recoveries. With storage snapshots we have the following options in Veeam Backup and Replication:
- Instant-Recovery of a complete VM
- Guest file recovery
- Application item recovery
Compared to the regular Veeam recoveries, you probably are familiar with, all those options use a completely different path for your data during a recovery.
The data can not be fetched directly from a repository, as none is involved here. So, before being able to leverage any of the above methods, the snapshot has to be mounted somehow. This is done via an ESX host. You have to define the host you want to mount the storage snapshot to. Veeam does that fully automatically by mapping the snapshot to the host. It has to be a host though, that has access to the DataCore storage we are tangling with.
Instant-Recovery
If we have to fully recover a VM to be available and boot within a blink of an eye, we go for “Instant VM recovery” and just choose the VM and the restore point. Note the bug again, that falsely sets this restore point to the year 1970. This happens for every application consistent VM inside a snapshot. See previous chapter.
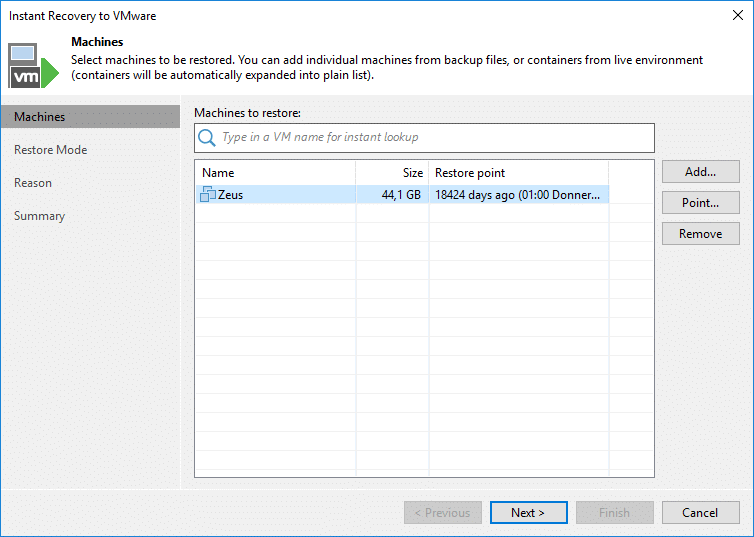
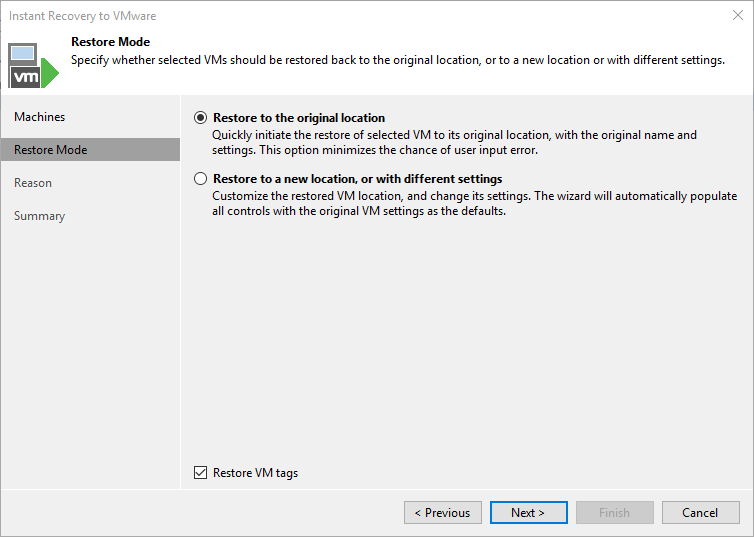
Now, as with every “Instant VM recovery”, we have the option to recover to “…the original location” thus using the same ID (MoRef, more precisely). Doing that, we can have the VM be recognized by Veeam again in my existing backup jobs. But Veeam will have to delete the original VM first as the ID has to be unique.
The option “…to a new location…” creates a VM in parallel with a new MoRef/ID, so both can co-exist.
In our example, as in the example we will recover a productive domain controller, I will choose the second option. So, not to mess with the productive workload.
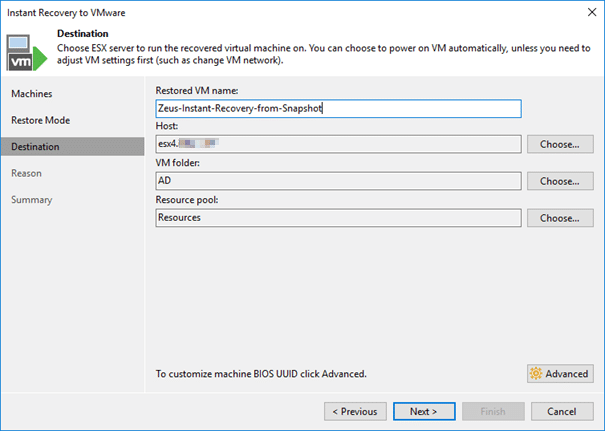
On the next screen we choose a name for the independent VM and the host to which it will be published.
Finally, we have to choose whether to start the VM immediately and if we want to connect it to the network. I won’t connect to the network, as the productive VM one is still active.
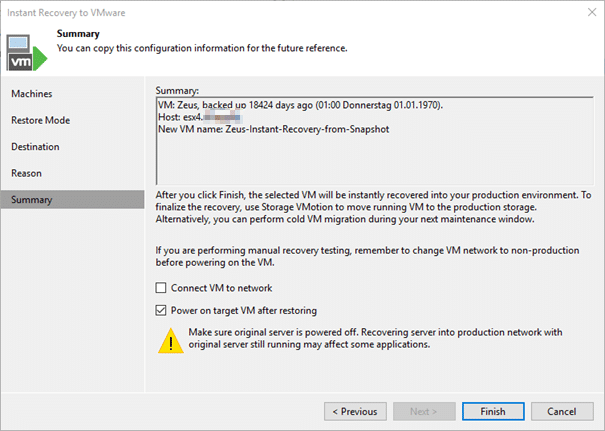
What happens once we clicked “Finish” is the following:
The snapshot will be cloned inside DataCore into an independent volume first (VeeamClone PT). This volume will then be snapped again.
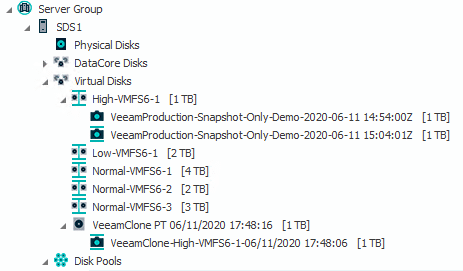
This newly created helper snapshot will be finally mounted to the ESX host chosen.
Now Veeam is ready to initiate a resignaturing of the LUN in the ESX and register the VM to be recovered with the chosen name.
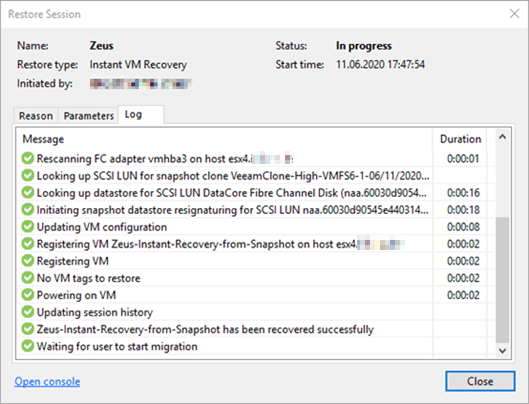
In the end Veeam will wait for a storage migration, as it would with every “Instant VM recovery”.
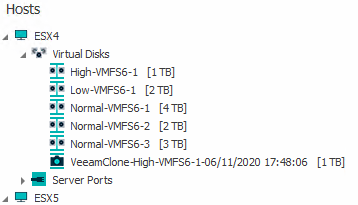
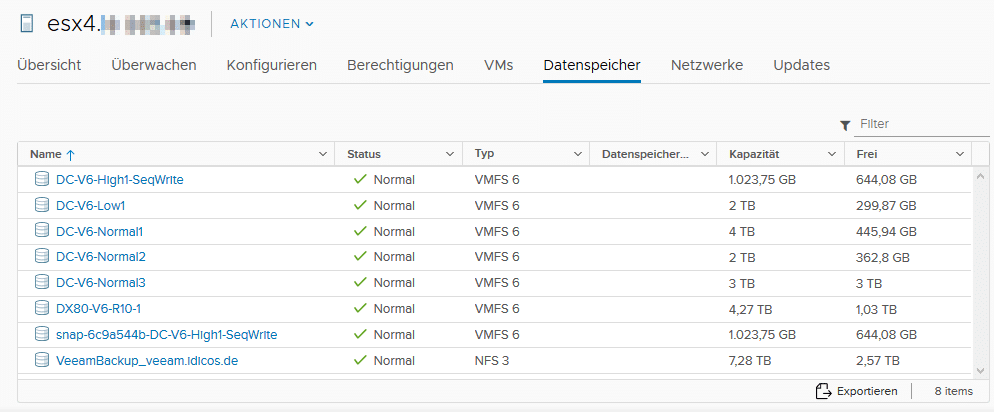
Note the additional temporary LUN being visible inside the VMWARE client as a “snap-…” datastore of the same size as the productive LUN.
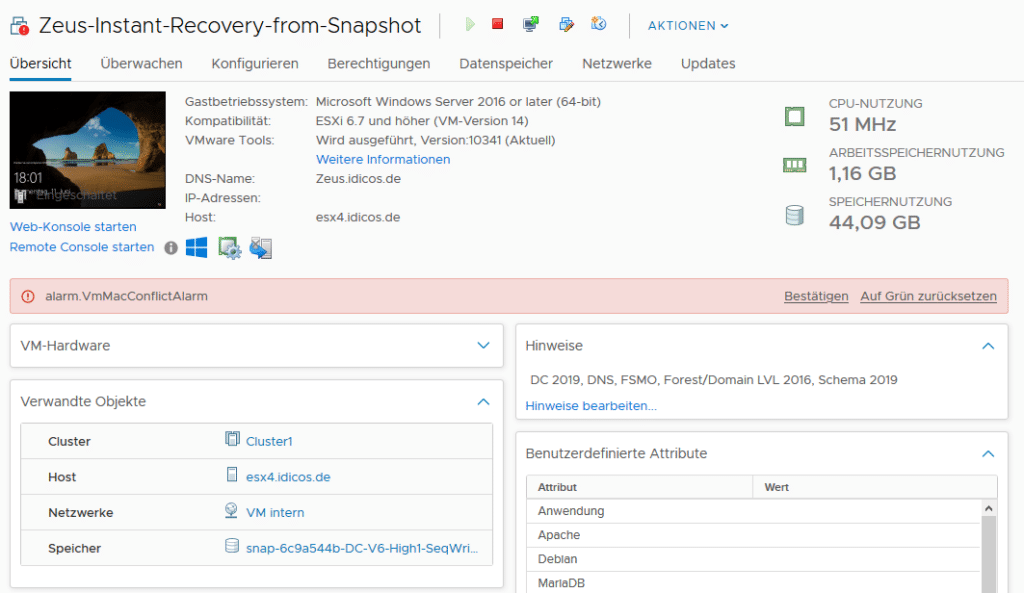
The VM will fire an alarm because it bears the same MAC-address as with every recovery in parallel to the original workload. We can safely ignore that. We should never bring them live to the same network at the same time anyways.
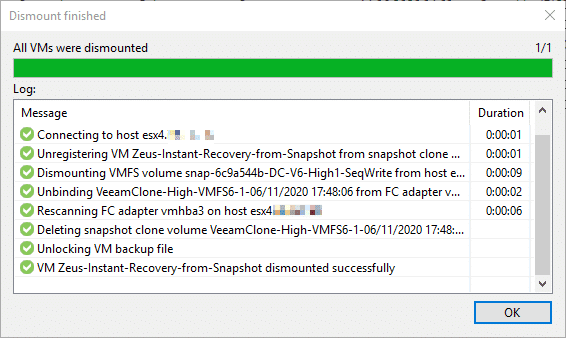
Once finished with the recovery, we should not forget to stop the “Instant VM recovery” job to allow for deleting the clone and cleaning up.
Guest file recovery
Guest file recovery is also a common scenario that can be accomplished from a DataCore storage snapshot. As an example, this time we will activate from the “Storage Infrastructure” menu. So, we won’t have to choose a restore point as a specific snapshot defines one already.
The rest of the process works quite like the “Instant VM recovery” on the storage level. We need helper host here to mount the snapshot of a clone that will also be generated to.
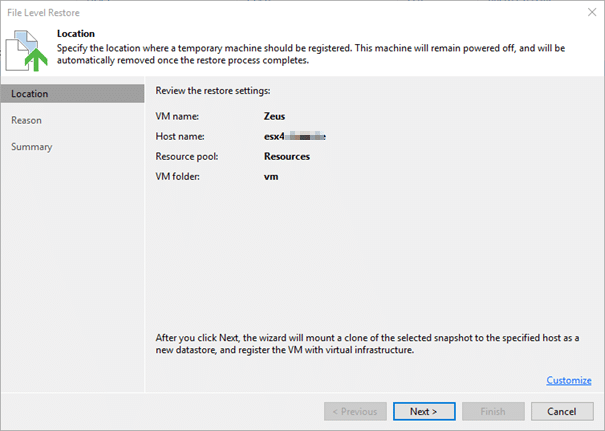
After mounting, resignaturing and registering the VM we’re back to normal. The well known file recovery console opens to be used for the actual recovery.
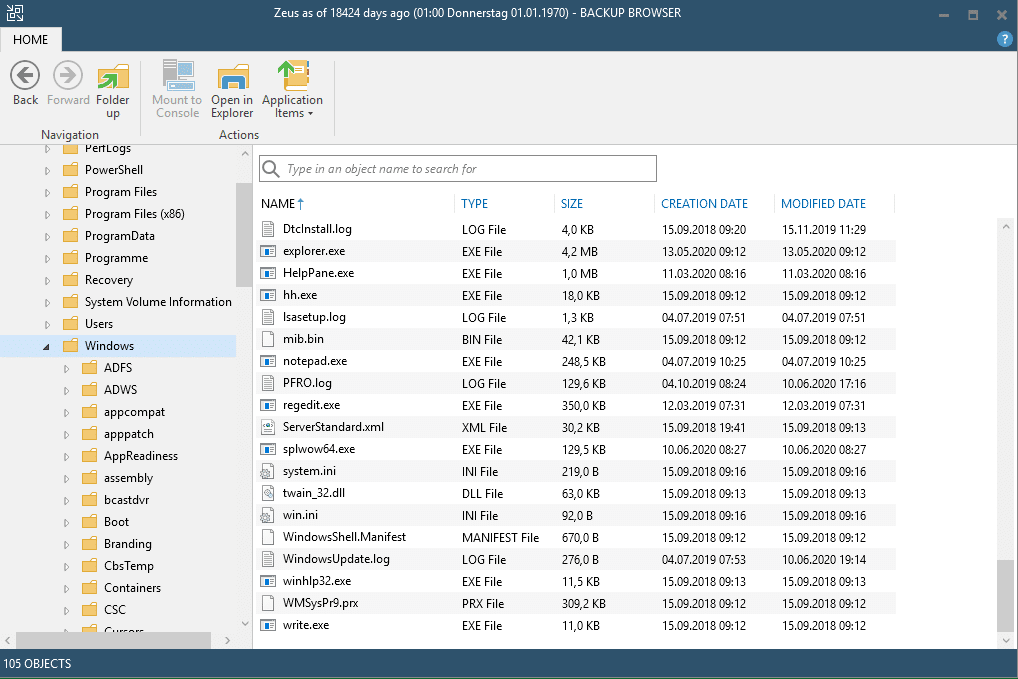
Don’t forget to close this console after having finished to allow to clean up on the DataCore side again.
Application item recovery
The final option we have with snapshots is an application item recovery. Here all the Veeam Explorers are at hand to recover objects from the different workloads.
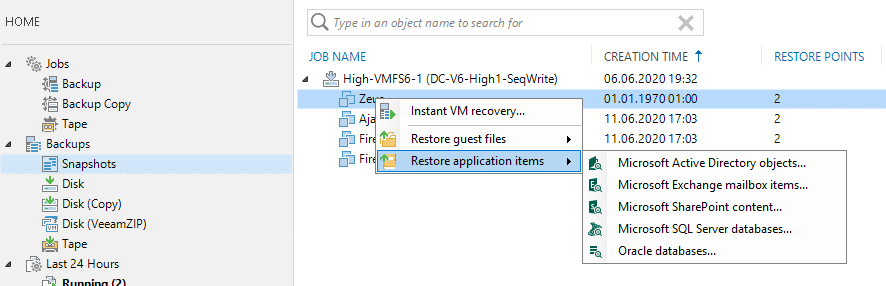
On the next screen we once again have to choose the restore point, as we have initiated the process from the “Backups” tree. Mind the 1970 bug again.
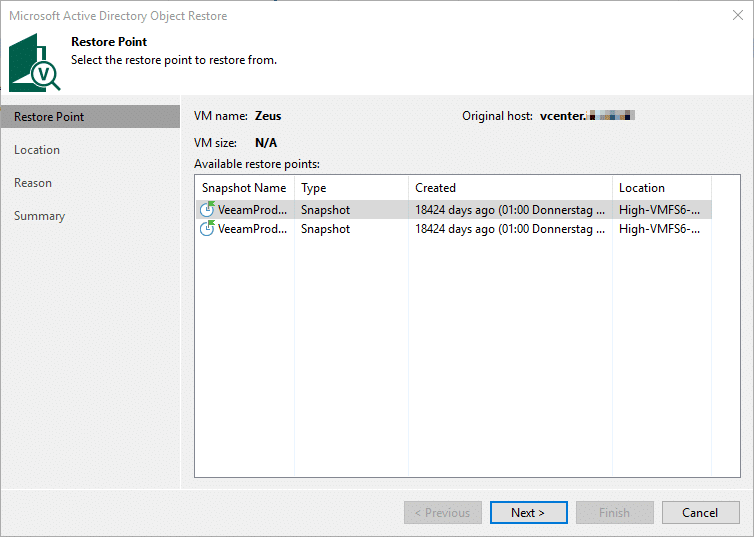
Next we have to choose the helper host for the mount.
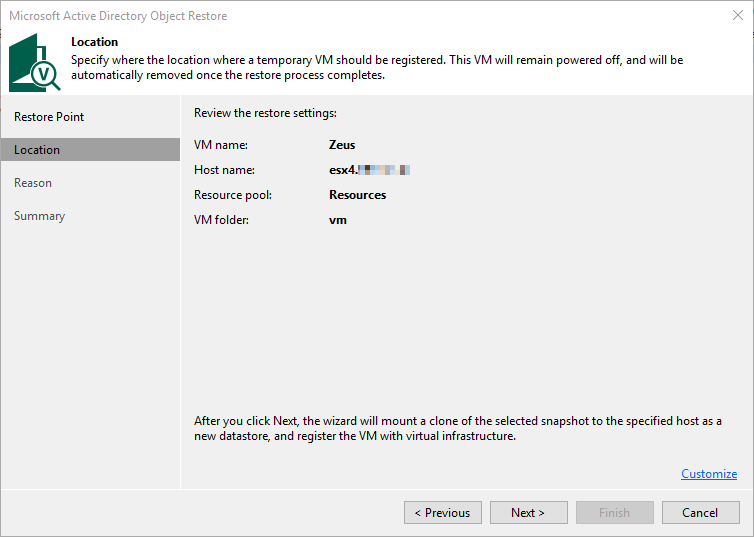
Finally, when all clones, snapshots and mounts are there, a Veeam explorer will open up to allow for a recovery of the chosen object type. Active-Directory objects in our example.
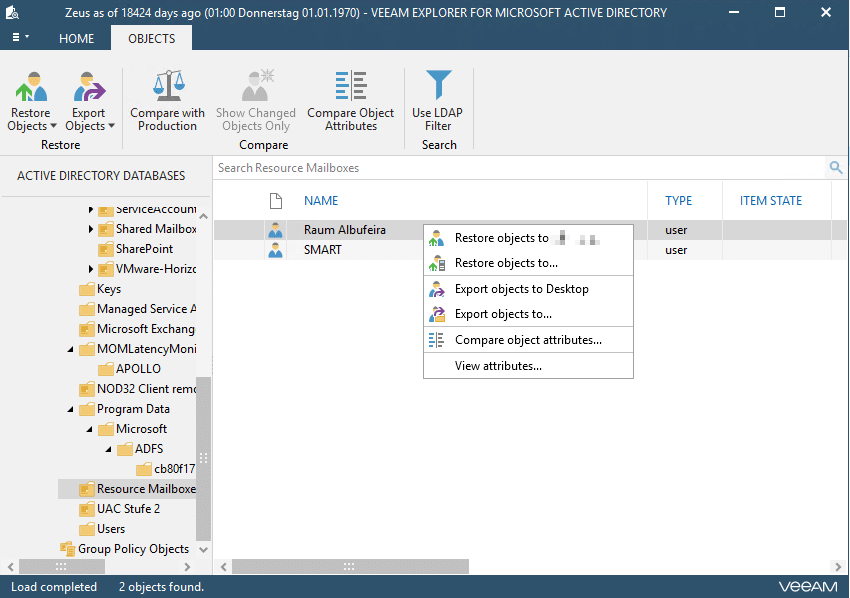
Again, close Veeam Explorer once finished to clean up DataCore and the helping host.
DataCore license limit
As already explained, all three processes clone the snapshot to be recovered from first into an independent volume within DataCore. This volume will be snapped again and this snapshot will be mounted to the helping host. Here a small problem might arise with a certain license combination of DataCore you might have in place (legacy VL and SB).
For the VL license a so called blind activation fixes the problem. It just removes the expansion limit. Not so for the SB license.
Background: as the snapshot is cloned via re-mounting it to the same DataCore server, the managed capacity of your cluster increases by the size of this clone. This capacity is intentionally not counted towards your license in use. So no problem here. But with some license editions of DataCore, there is also a maximum expansion limit preset. When our cluster is already working close to this maximum headroom, we might face the issue that the additional re-mount exceeds this limit and therefore fails.

This would prevent the specific recovery. We can circumvent that issue if we leave enough headroom to allow a re-mount of the largest productive volume in our cluster without blowing the limit.
Hi All,
Good News on the way, Datacore PSP14 will come soon and will give new features through CDP. Thanks to this update Veeam will be able to directly access the Datacore CDP. No more need Datacore Snapshot. Big Data economy and big flexybility.
Veeam normaly will update VBR just after and thats’it. We’ll all be able to recover a VM or guest files from reading Datacore CDP in point in time. (depending on how much you allocated to DC CDP for sure)
Hi Loïc.
Thanks for the update. To my knowledge it will even be uncoupled from PSP14 and is to be released as an updated plugin pretty soon.
An update to the blog post will follow. In general it will deliver the same outcome but the process will be much easier to handle.
Great news for DataCore users having a slight fear of ransomware (who does not?). 😉
Hi All,
which SAU size would you recommend for the snapshot pool?
If you use CDP, is there any advisory which SAU size should be used?
I read the Veeam digest from gostev. Veeam released the CDP feature in their updated Datacore plugin. I’m really looking forward to your blog post update.
Hi Alfred.
For a pure snapshot pool one might want to go as small as possible. I usually stick with 8 MB. 4 MB could also be an option. The smaller, the longer the pool can support your snapshots.
For CDP I did not find a best-practice recommendation. Through talks to DataCore SEs I narrowed my personal best-practice to 32MB as a trade off between overhead and granularity.